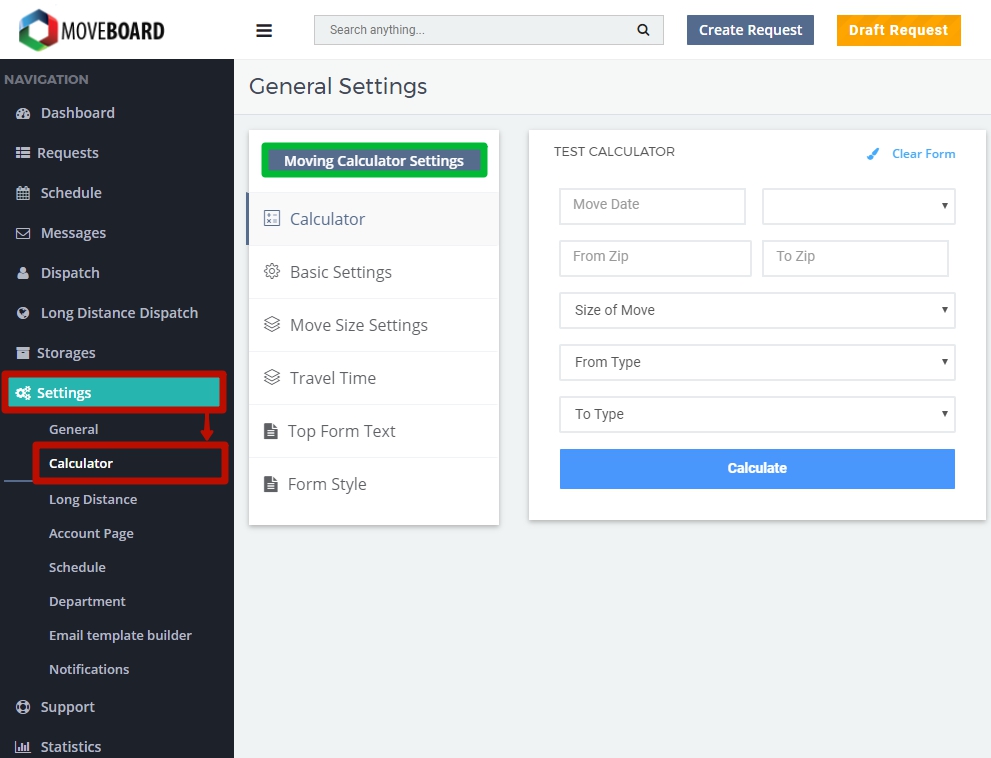
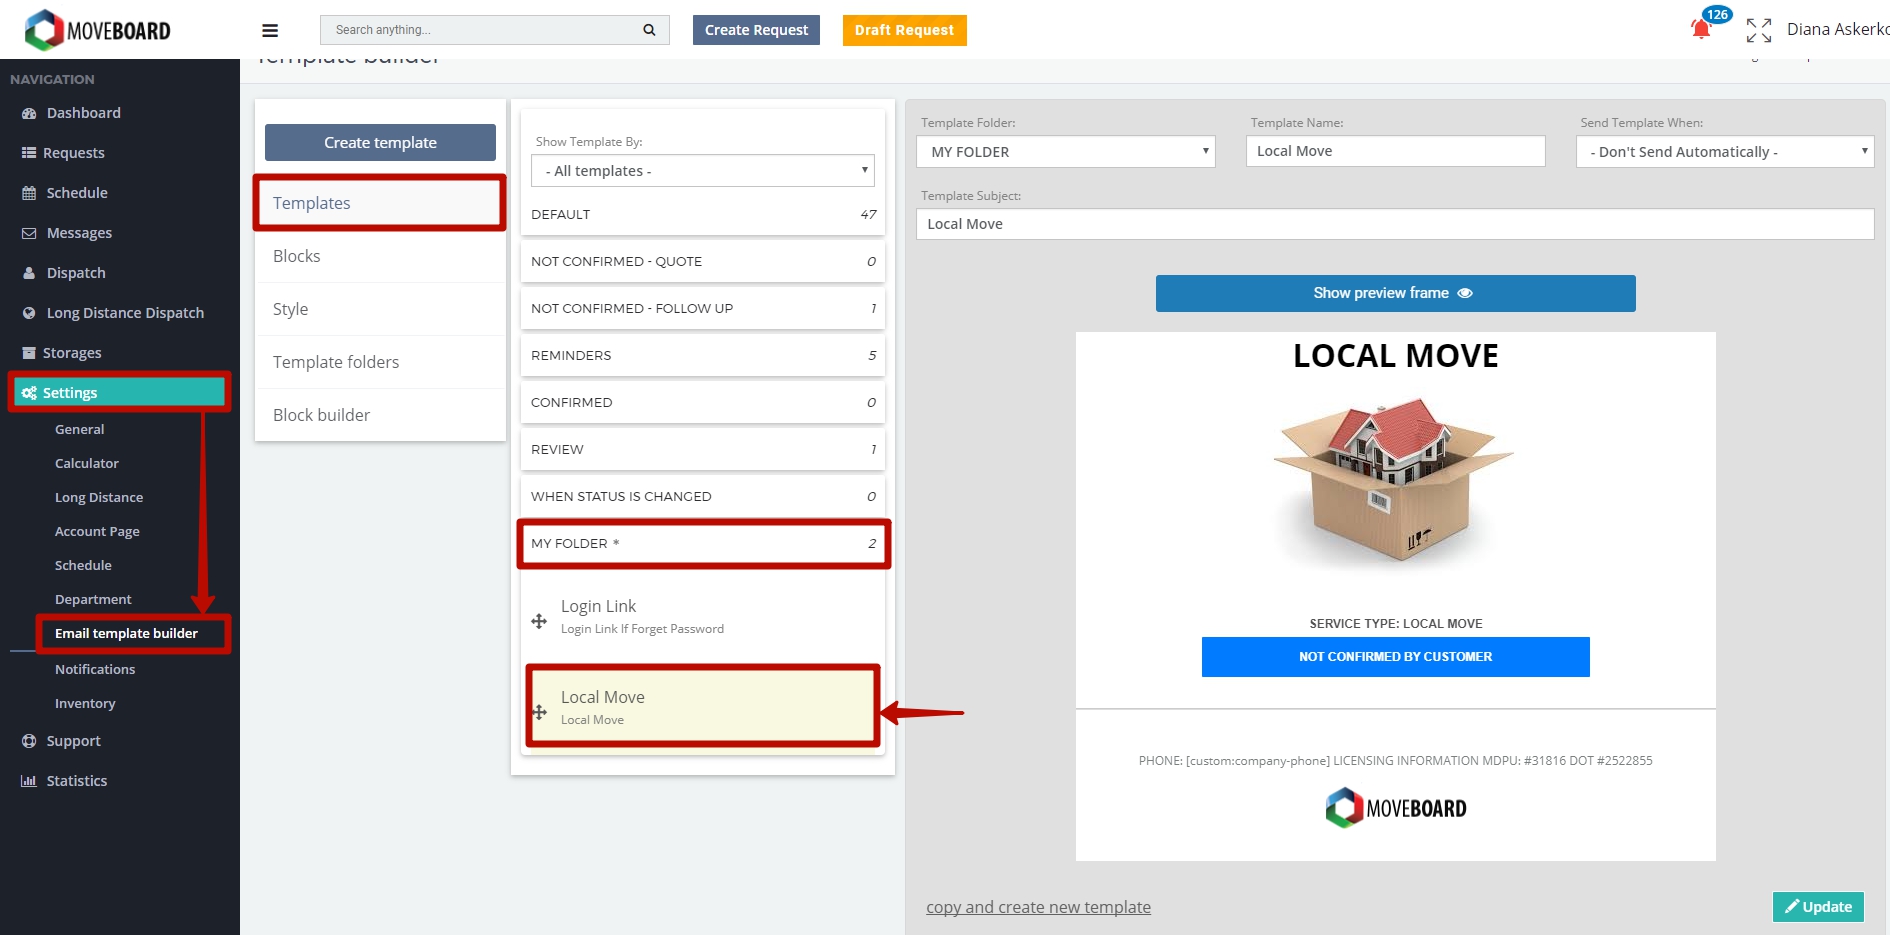
To make Calculator Settings go to Settings > Calculator:
There are several tabs that you can make settings for:
- Calculator (in this tab the calculation of a quote is demonstrated);
- Basic Settings;
- Move Size Settings;
- Travel Time;
- Top Form Text;
- Form Style.
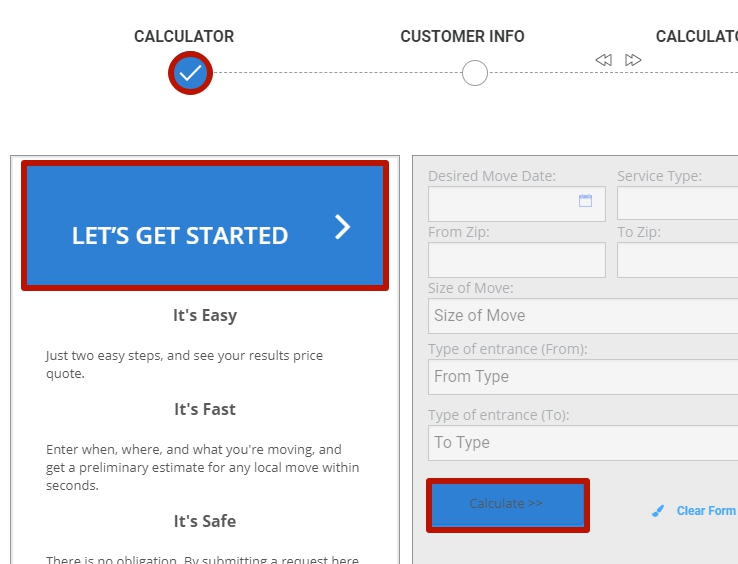
1. Calculator
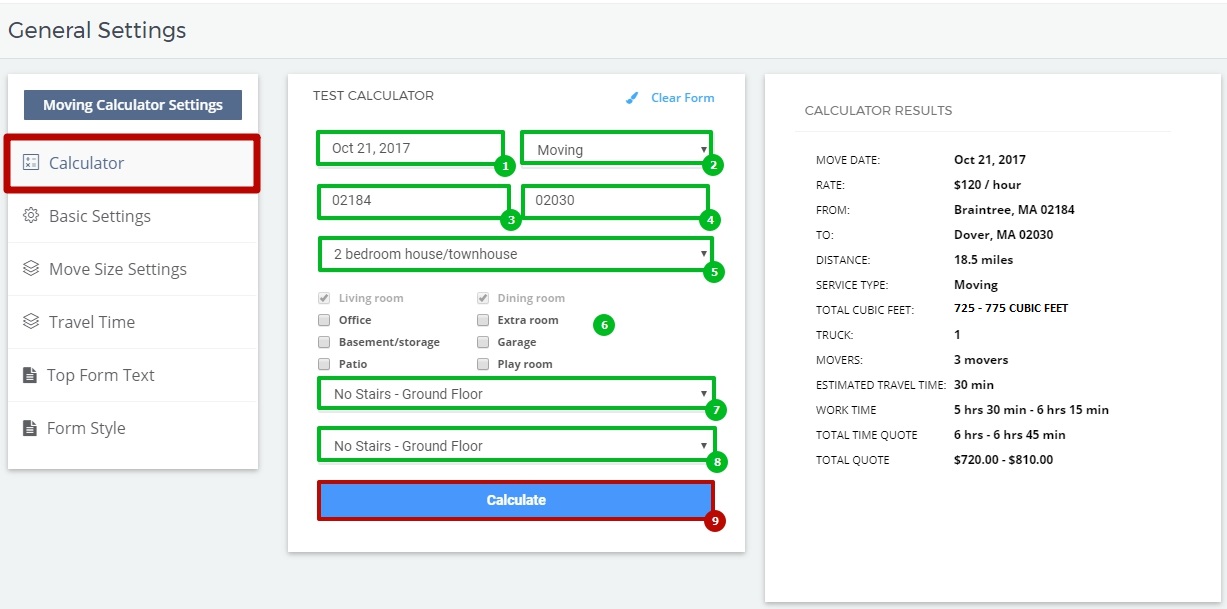
In the Calculator tab you will see a Test Calculator. To check how it works add the following data:
- The Move Date;
- The Move Type;
- Zip code of a place you move From;
- Zip code of a place you move To;
- The Move Size;
- Choose additional rooms (if needed);
- Entrance type of a place you move From;
- Entrance type of a place you move To;
- Click on Calculate:
 NOTE: To study how the Quote is Calculated in detail read Calculator. How does the System Calculate a Quote?
2. Basic Settings
This section has several subsections:
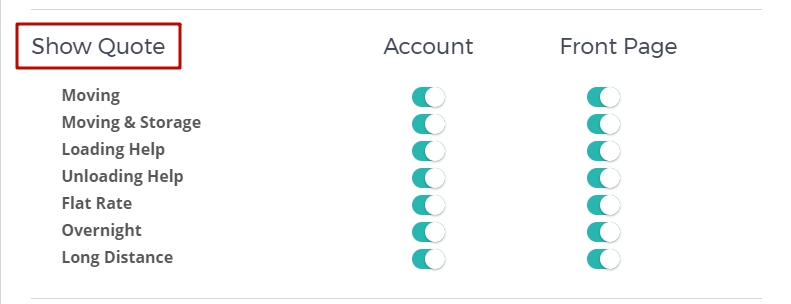
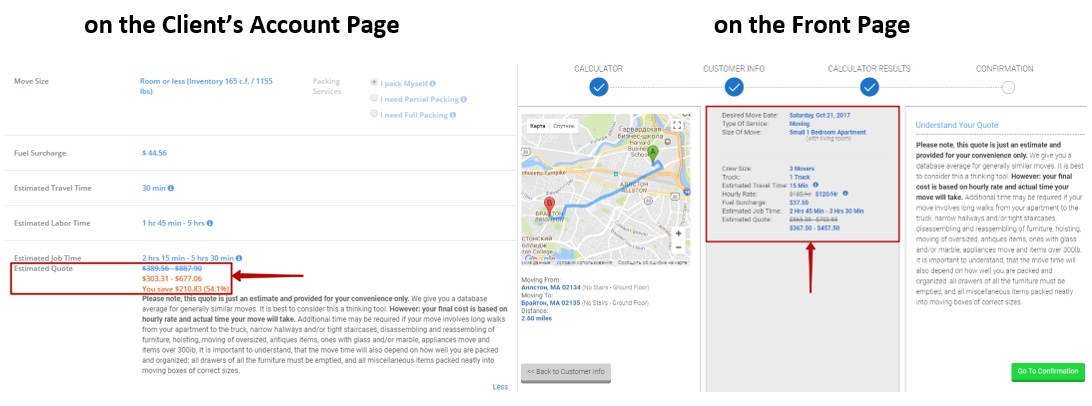
- Show Quote in Account / on Front Page
Choose where you want your Client to see a Quote:
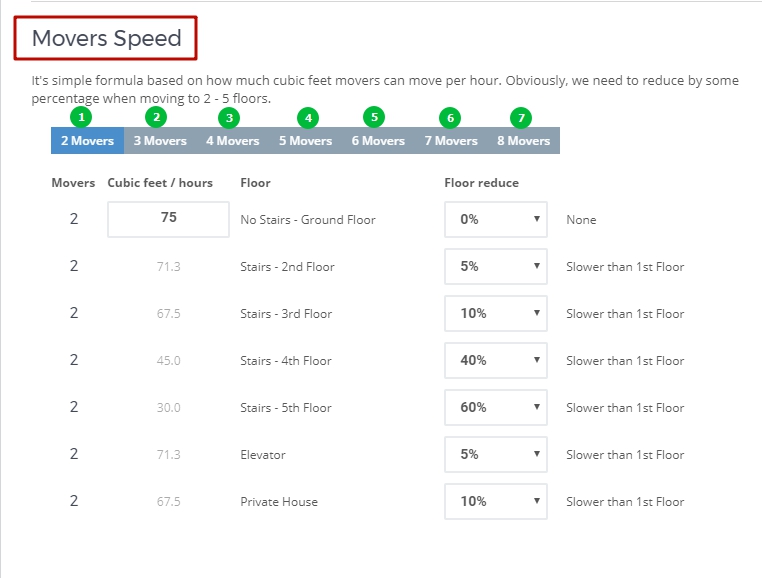
- Movers Speed
In this subsection you can make your own settings on how many cubic feet different number of Movers (2-8 Movers) can move in accordance with different Entrance Types:
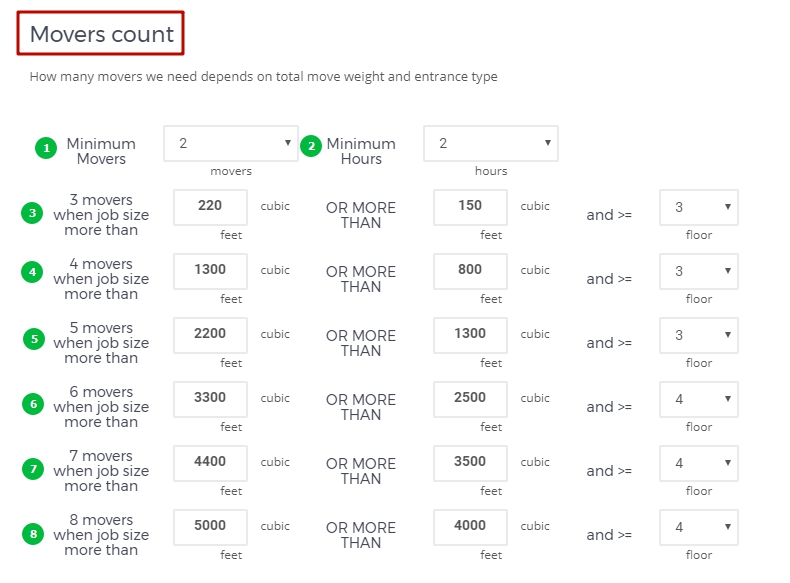
- Movers Count
Here you are supposed to enter Minimum Movers and Minimum Hours you are going to charge your Clients for.
You can also make your own settings on how many Movers you need for a particular volume of work basing on Cubic Feet and Entrance Type:
NOTE: To learn more about the latter 2 subsections you can read Movers Count & Movers Speed. - Truck Count
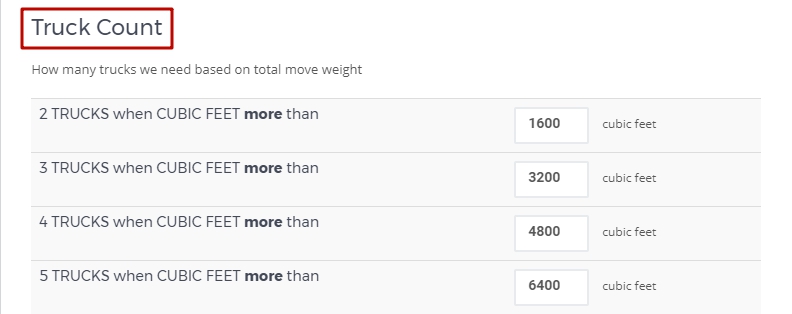
In this subsection you can make preferable settings for the number of trucks you need for a particular job basing on the amount of Total Cubic Feet:
3. Move Size Settings
In this tab there are 2 subsections you can change default settings for:
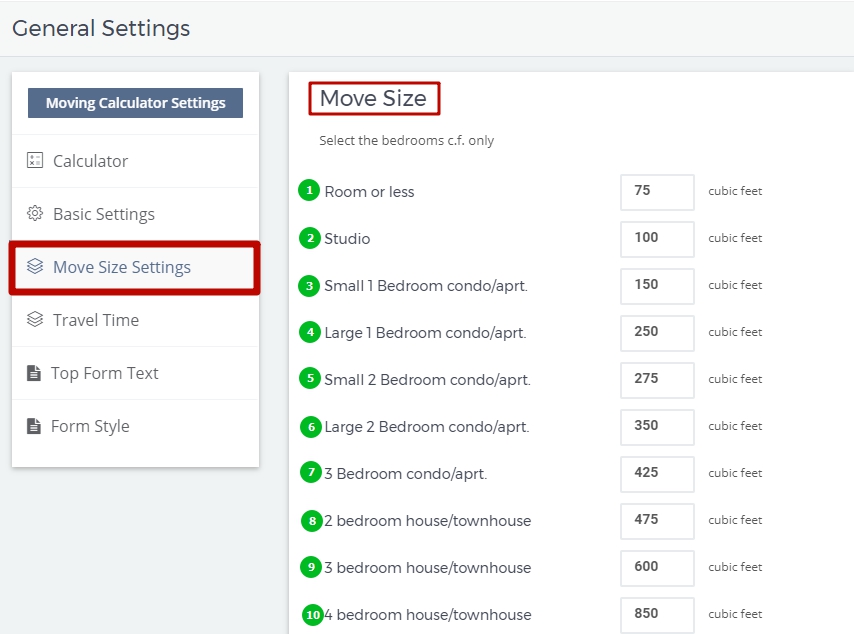
- Move Size
Here you can change the amount of cubic feet for bedrooms in different types of dwellings:
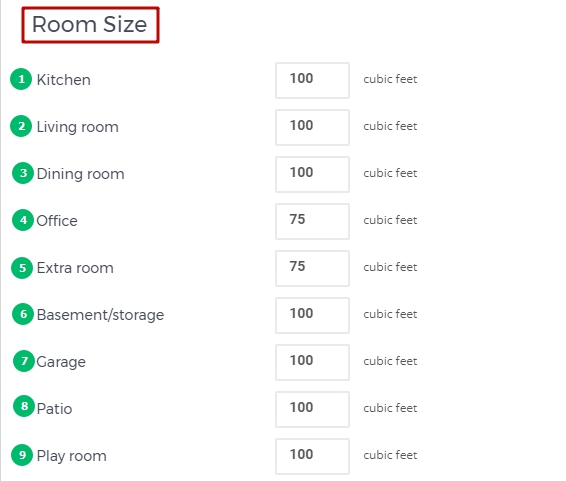
- Room Size
Make your own settings on the amount of cubic feet for other rooms (if needed). Mind that Kitchen is added automatically to the Total Move Size:
NOTE: To learn more about how Move Size is calculated read Move Size Settings.
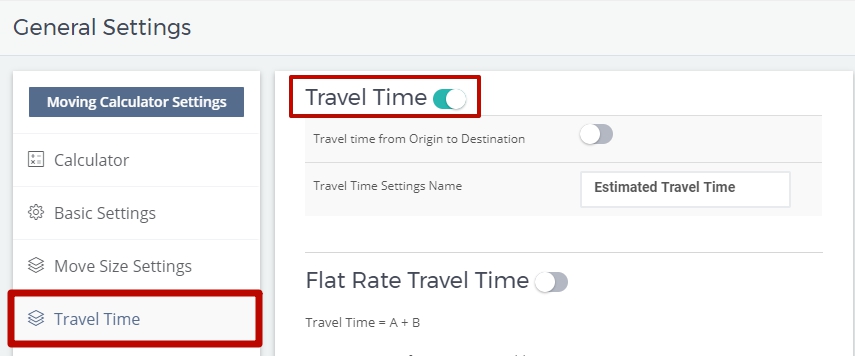
4. Travel Time
TRAVEL TIME is time spent to get from your Parking Zip to the place of Loading and from the place of Unloading to the Parking Zip.
This section has 5 subsections:
- Travel Time
Here you can turn on/off Travel Time and in such a way to decide if you want to charge your Clients for it:
NOTE: You can also turn on the function Travel Time from Origin to Destination. It means that you are not going to charge your Clients for Travel Time, but you will charge them for in fact Driving Time.
fgh
You can give “Travel Time” any name you perefer, for instance, Estimated Travel Time. - Flat Rate Travel Time
In this subsection you can make settings which can be viewed as a discount for Local Moves.
Within a certain radius from a certain zip code you can give your Clients a flat-rate charge for Travel Time:
 For this:
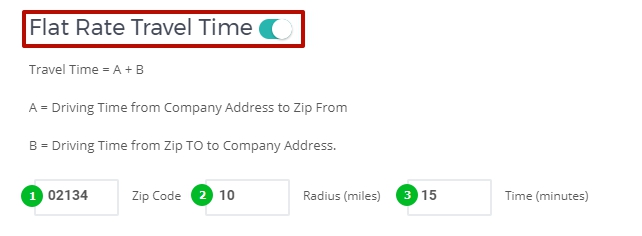
1) Turn the function on:
2) Enter a zip code (as a rule your parking zip, but not necessarily);
3) Enter a Radius;
4) Enter the Time (in minutes) you are going to charge within the given Radius for.
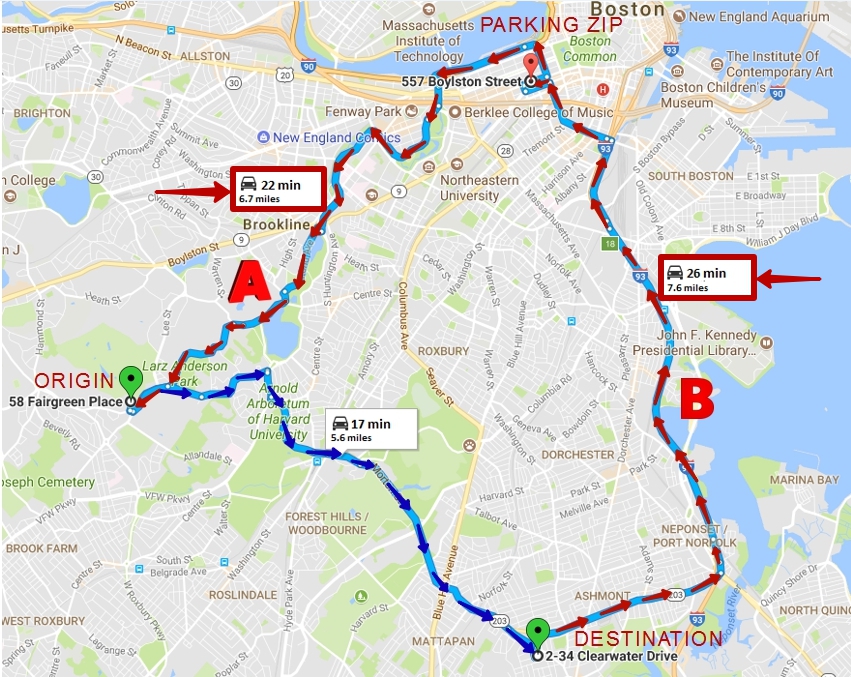
There are 3 possible cases in this respect:
1) If both A (Time spent to get from your Parking Zip to the place of Loading) and B (Time spent to get from the place of Unloading to your Parking Zip) are within the given Radius (10 miles) Travel Time will be counted as 30 minutes (15 min + 15 min):
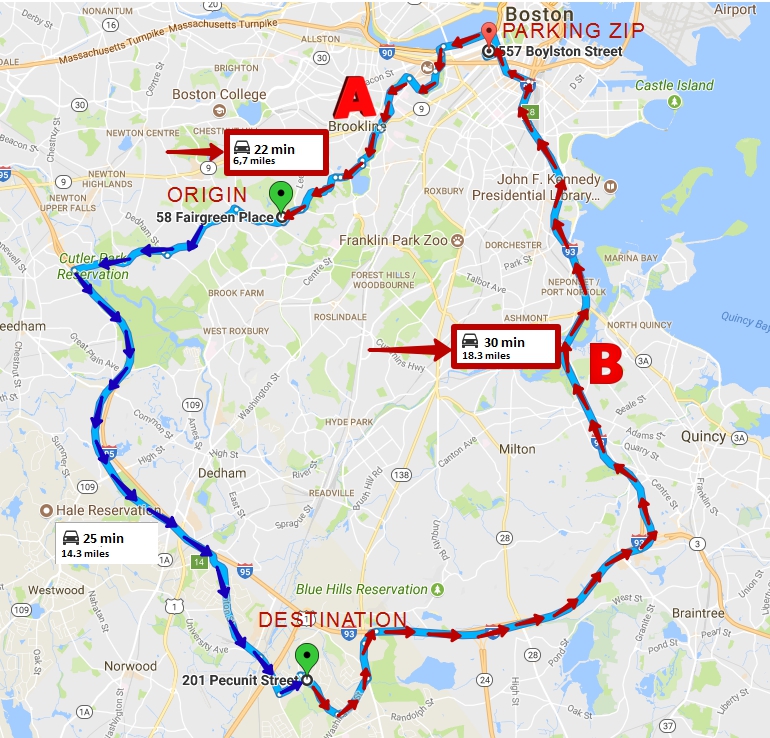
2) If only A or B is within the given Radius it will count 15 minutes + the other part of the distance in accordance with Google Maps indication (15 min + 30 min = 45 min):
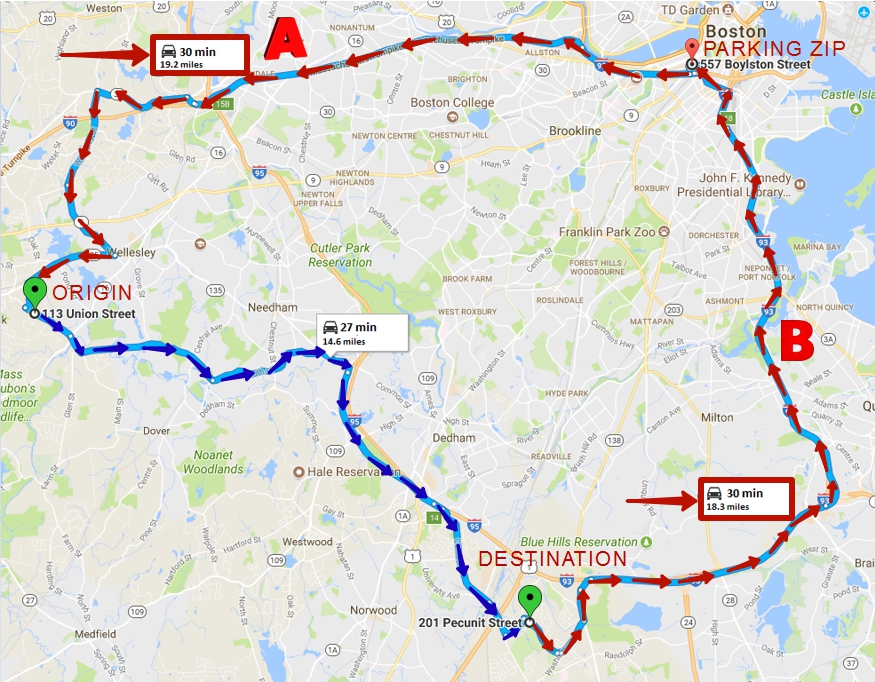
3) If neither A nor B gets into the given Radius this feature does not work and both distances are counted in accordance with Google Maps indication (30 min + 30 min = 1 h):
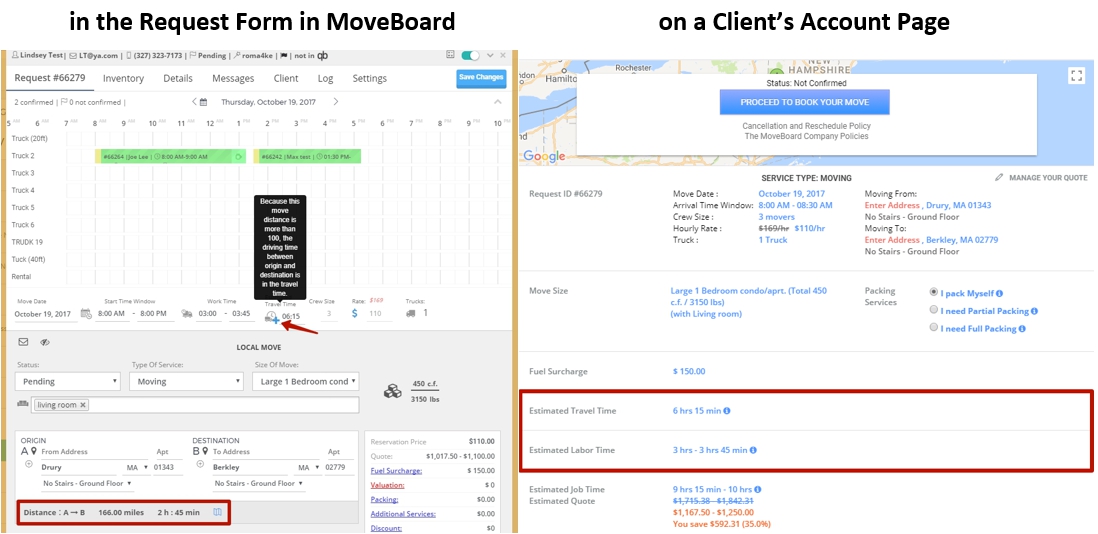
- Driving Time
DRIVING TIME is time spent to get from the place of ORIGIN to the place of DESTINATION.
In this subsection add the milage when Driving Time is no longer included into Work Time (for instance, after 100 miles):
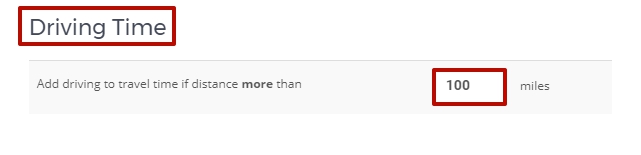 This setting means that if the distance between ORIGIN and DESTINATION is more than 100 miles Driving Time will be added to Travel time and shown in a Quote separately from Work Time:
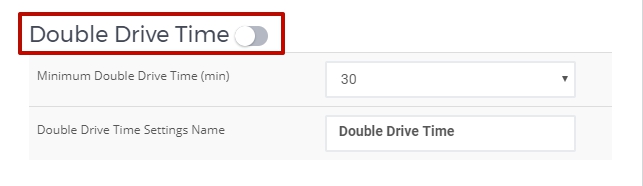
- Double Drive Time
This Setting is used, for instance, in California. The companies there do not charge their Clients for Travel Time. Instead of this they charge for Double Drive Time.
In case you use it DO NOT FORGET to add Minimum Double Drive Time you charge your Clients for:
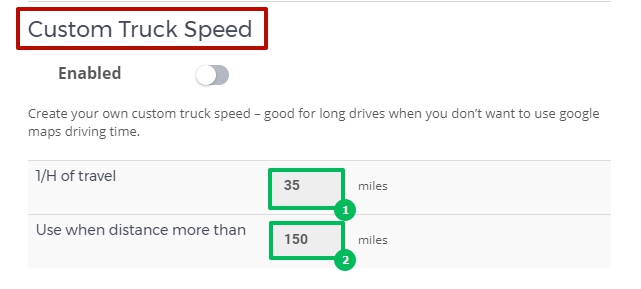
- Custom Truck Speed
In this subsection you can add preferable speed of your Truck after a definite milage when you do not want to use Google Maps Driving Time.
This setting is ecpecially good for long drives to provide your Clients with more exact data of Estimated Travel Time, because in reality Trucks move slower than an average indication of Google Maps.
5. Top Form Text
In this tab you can make changes of a Top Form on your Company’s Website (you can change its width, the text inside the form, the color of the background, etc.):
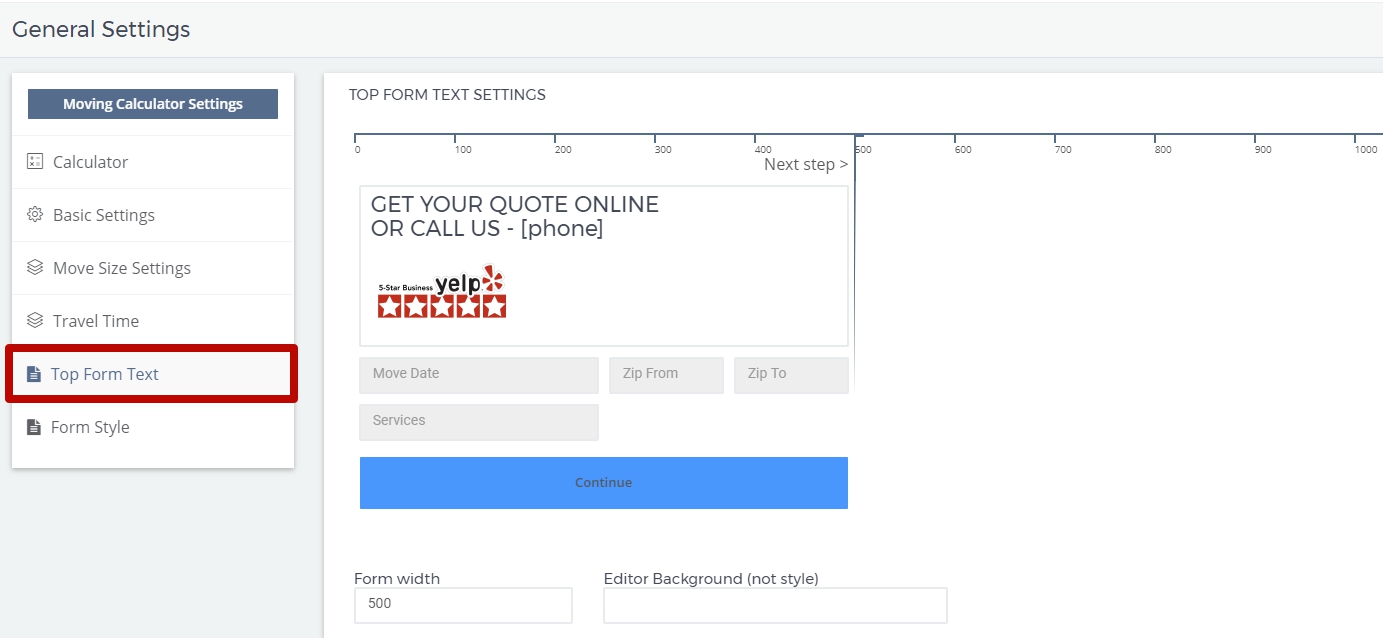
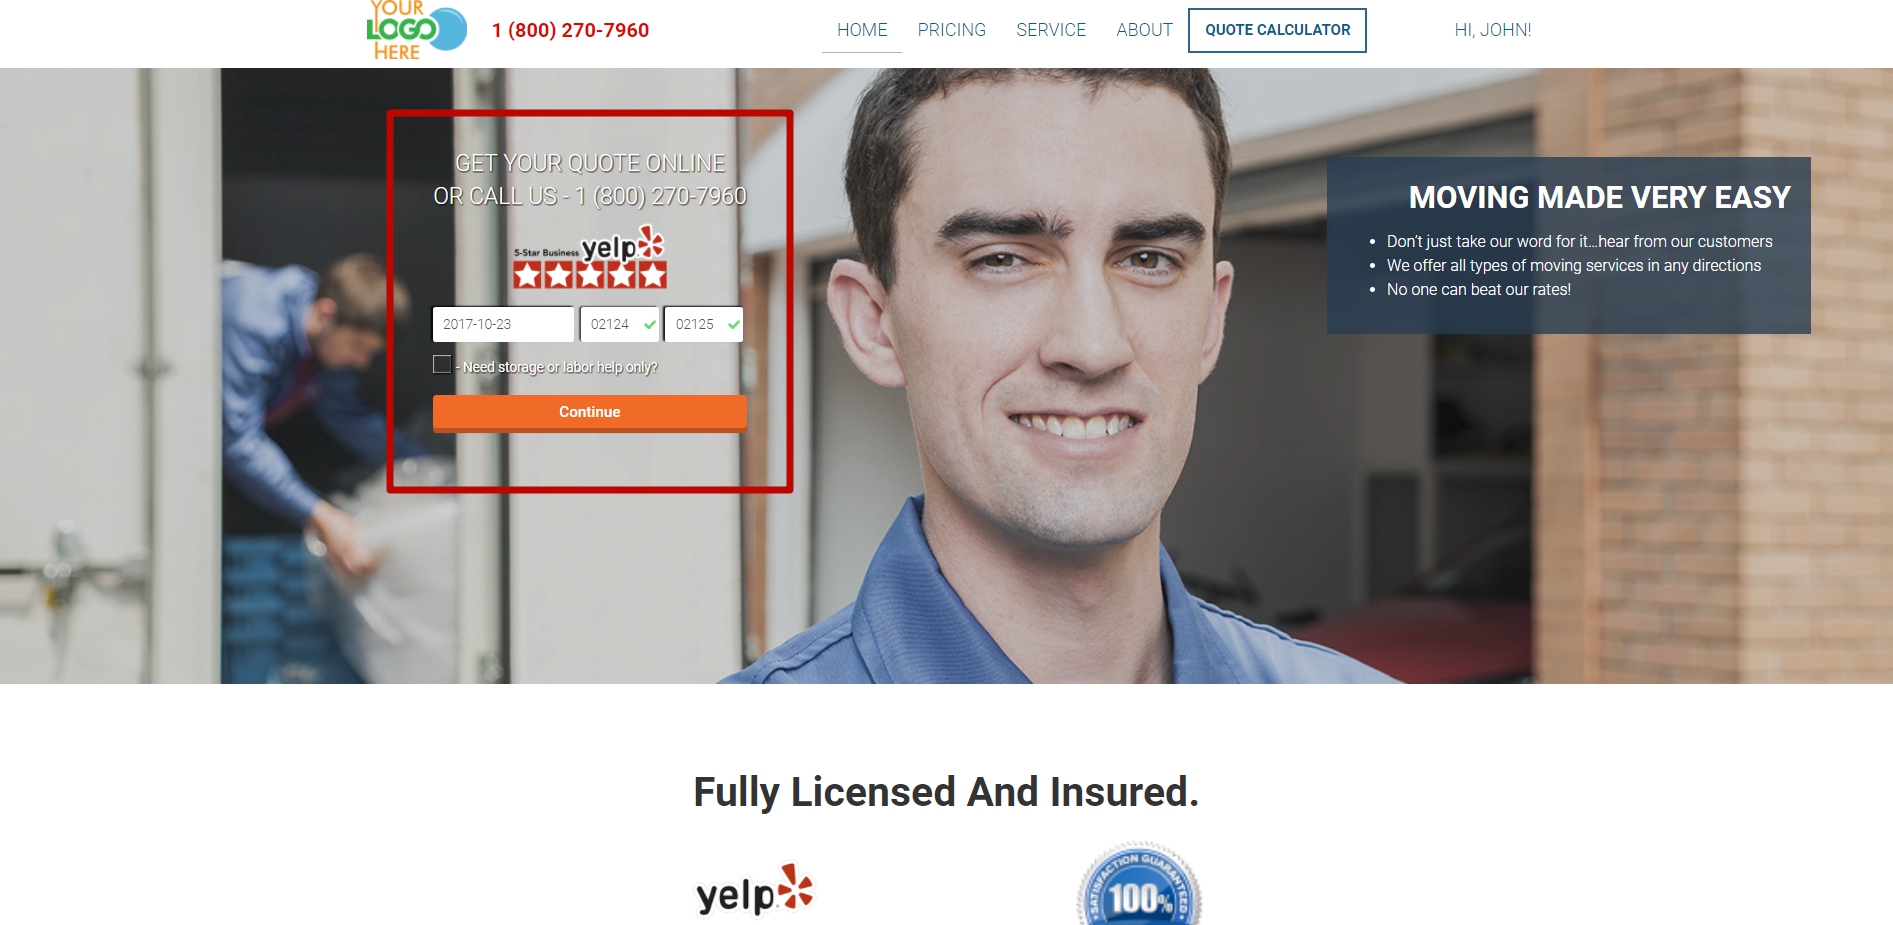
Here is an example of how it looks on the Website:
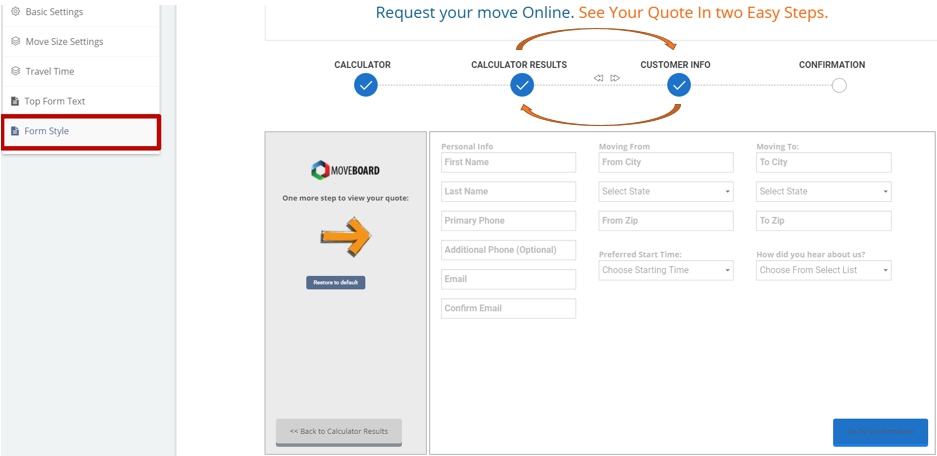
6. Form Style
In this tab you can make changes for an extended form of your Website:
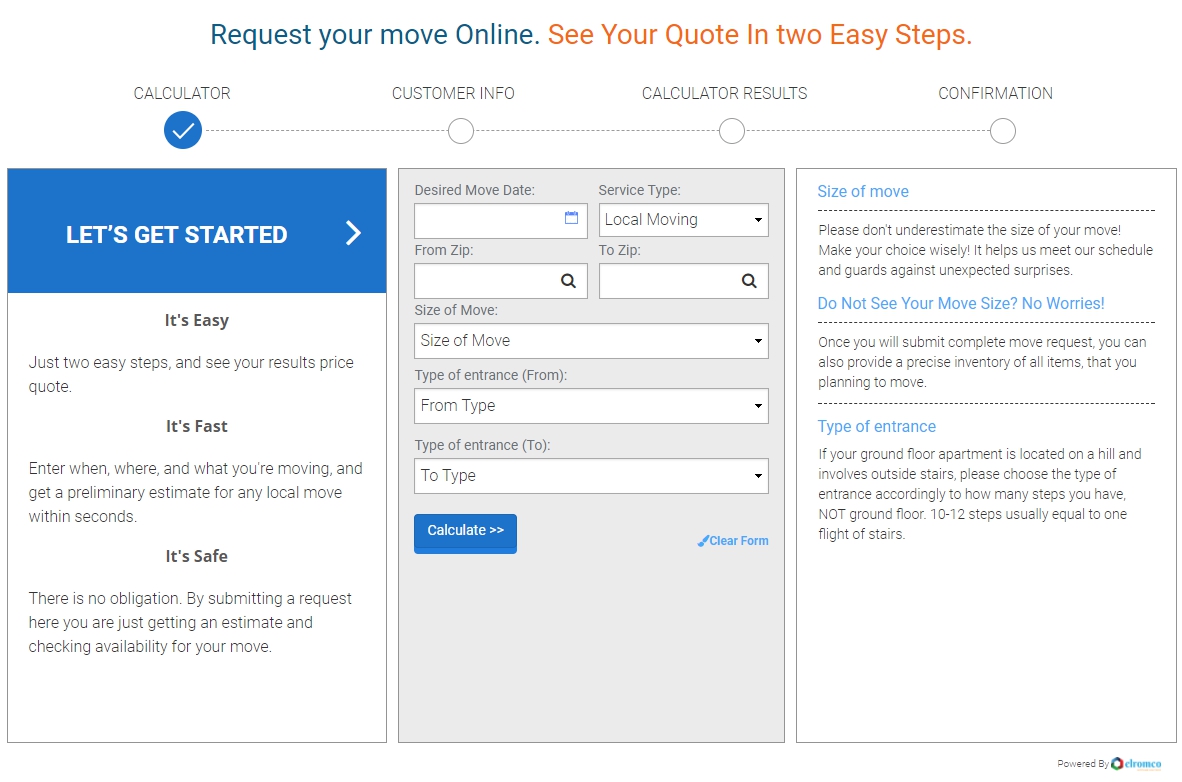
You can organize the form the way you like, for instance, change the text, the filling of the form in accordance with your preferences.
NOTE: CUSTOMER INFO and CALCULATOR RESULTS can be changed in places:
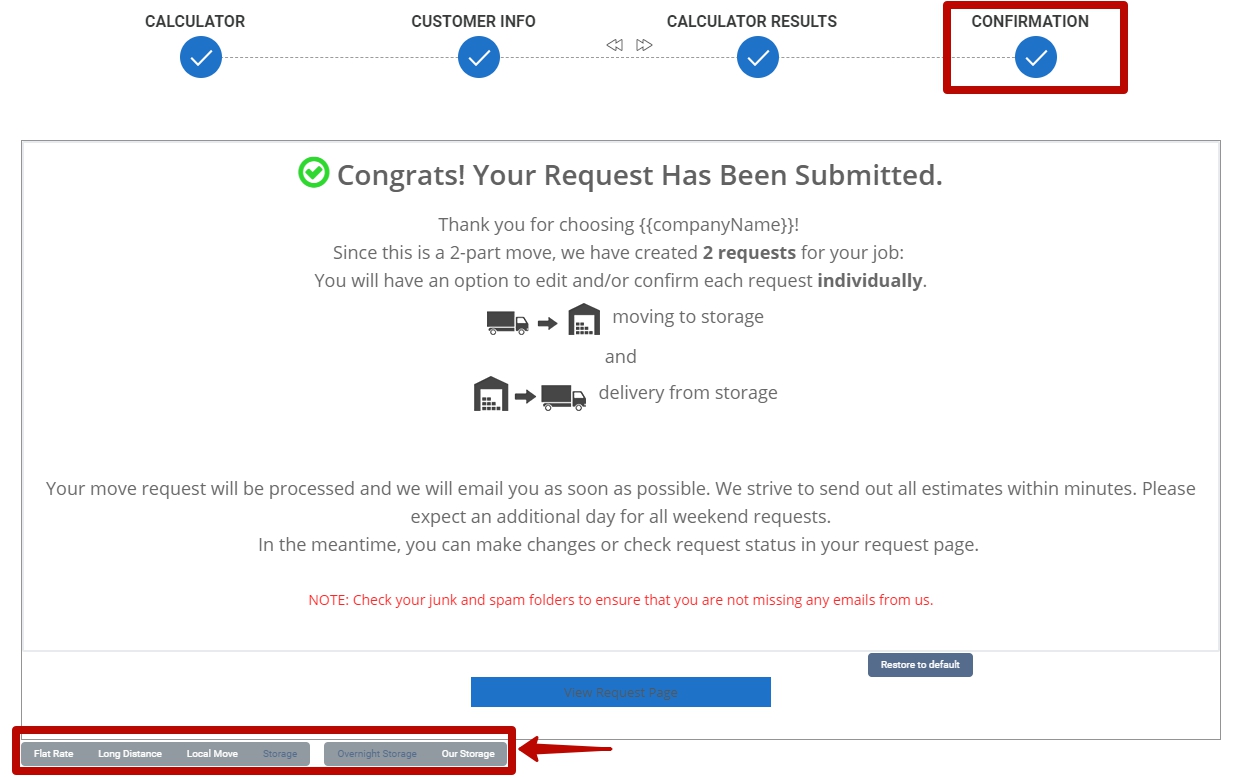
NOTE: In CONFIRMATION tab you can design different texts for different types of moves (Flat Rate, Long Distance, Local Move, etc.):
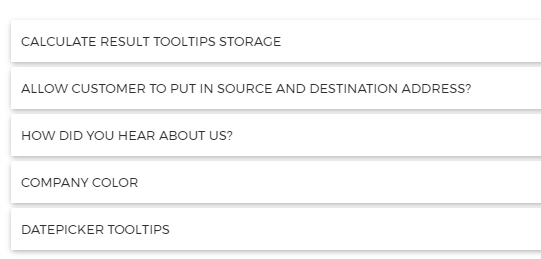
If you scroll down under the extended form you will also see some more tabs for the settings of the extended form:
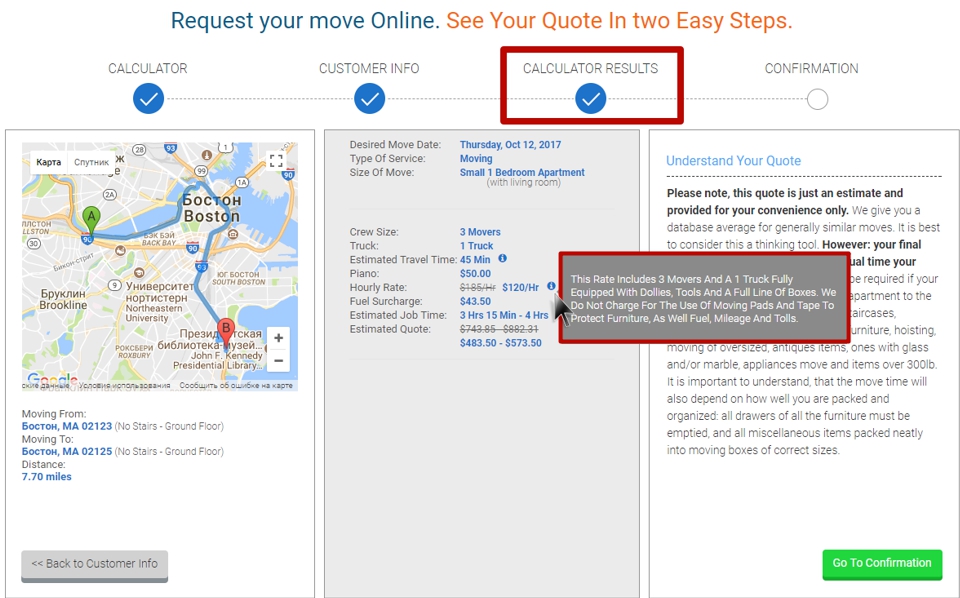
- Calculate Result Tooltips Storage:
You can give your own explanation of the notions here:
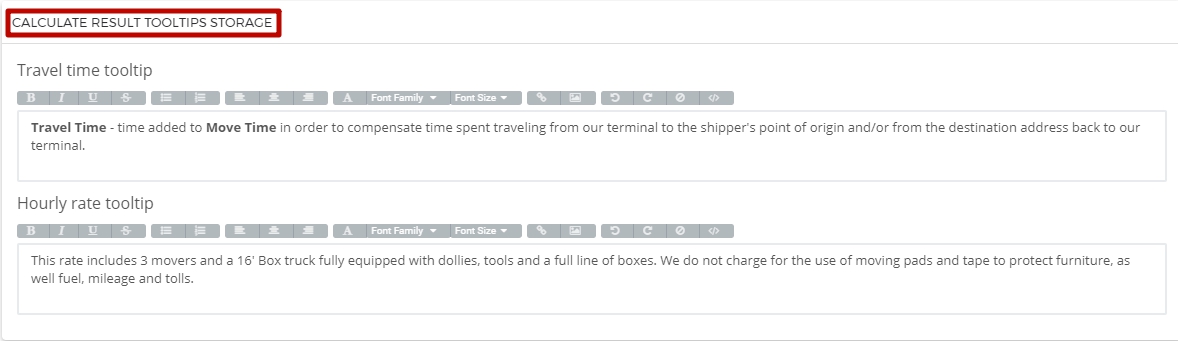
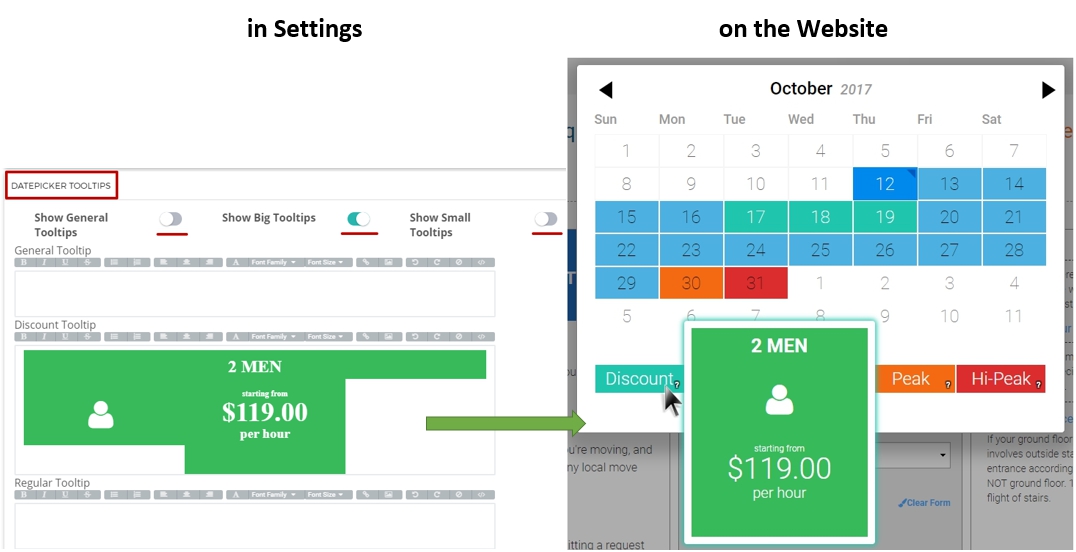
Your Clients will see them in the form in CALCULATOR RESULTS if they place the mouse pointer on the icon “information” like this:
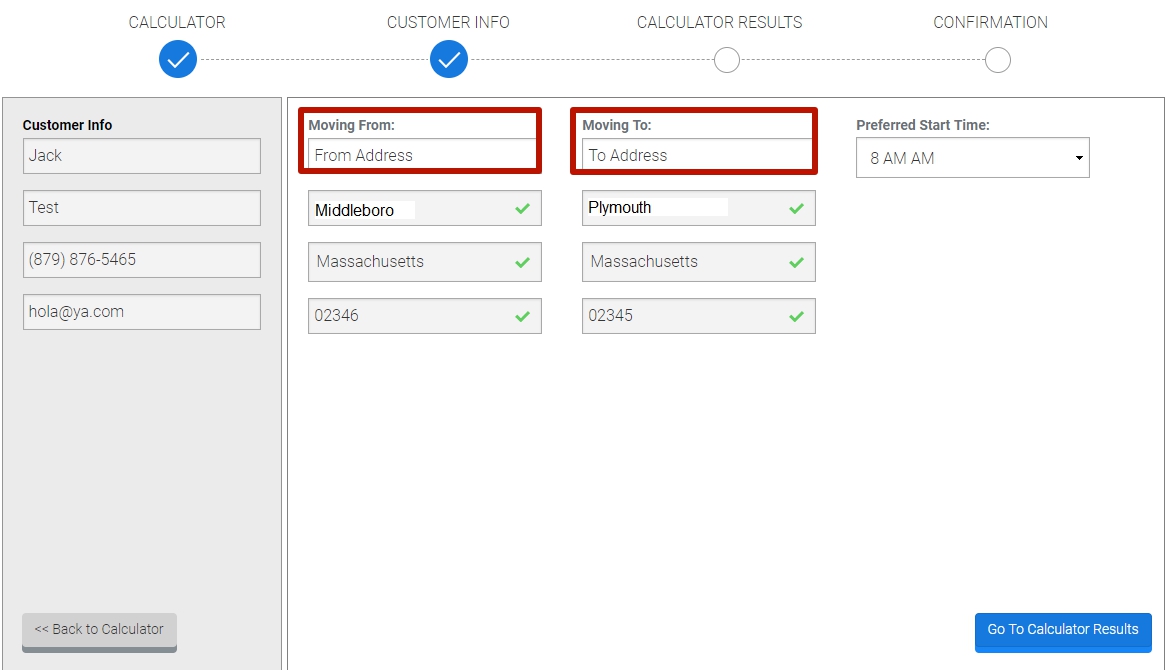
- Allow Customer to Put in SOURCE and DESTINATION address?
You can choose between showing and requiring Address in the form straight away or later before the Confirmation process.
 As a rule exact Addresses are considered to be private information so you can enable the function “Show Address” and in such a way give freedom of choice to your Clients to let you know this information right away or later:
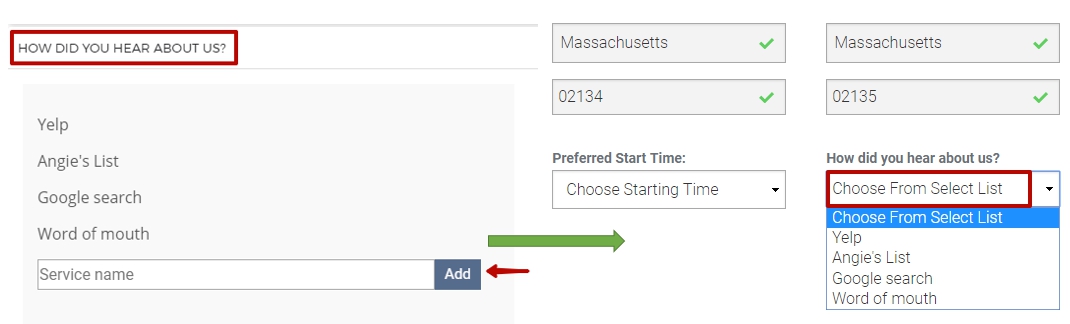
- How did You Hear About Us?
Here you can Remove or Add a source letting you know how your Clients heard about your company:
- Company Color
In this subsection you can choose the preferable color of the form:
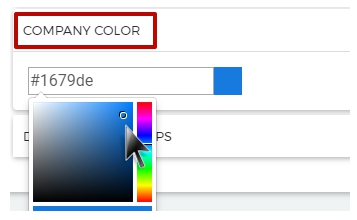 On your Website it will look like this:
- Datepicker Tooltips
You can also create tooltips to give a visual explanation of rates to your Clients when they choose a move date in the extended form by placing the mouse pointer on the icon of a rate: