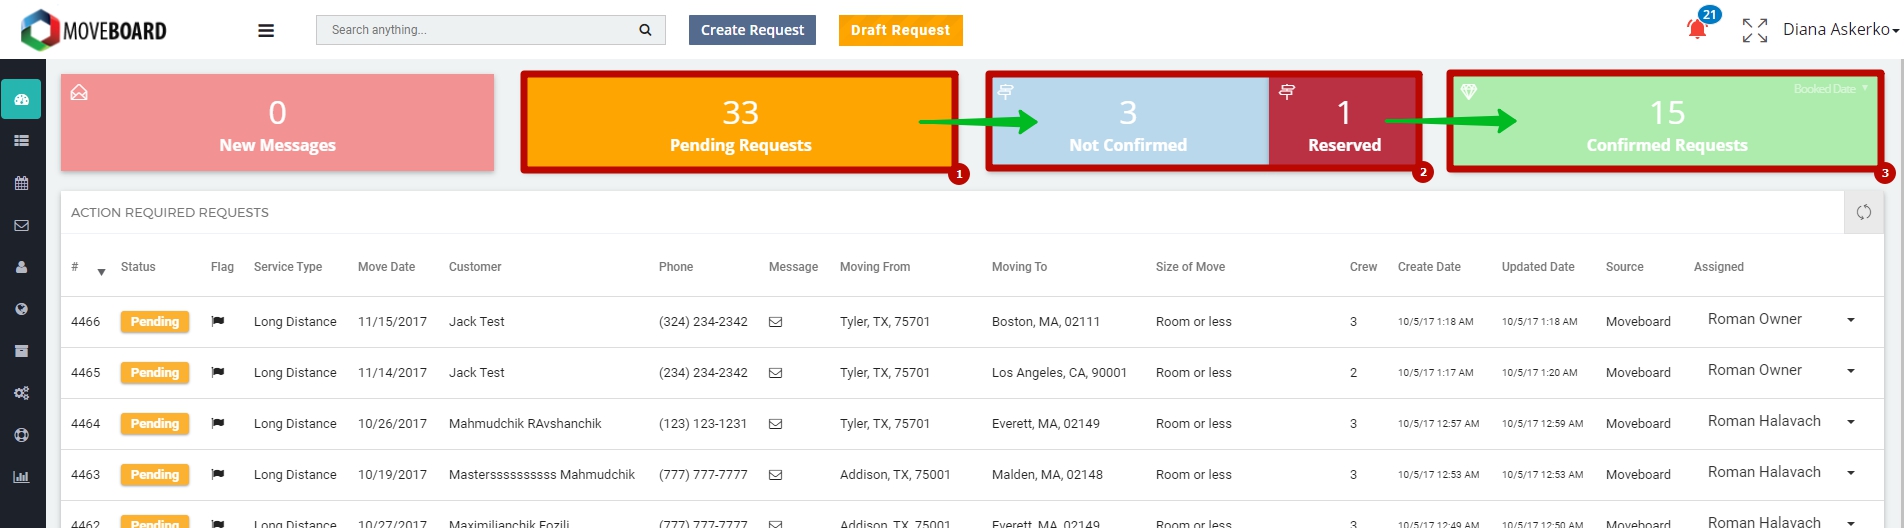
Basic Work Flow is the movement of the Request from Pending to Not Confirmed and finally to Confirmed Requests as shown below:

Pending Requests
This is where all your new leads or requests are stored:
There are 2 ways how requests can get here:
- When a Request was created from MoveBoard (to learn more read How to Create a Request from MoveBoard);
- When a Client creates a Request from your company’s Website, for example:

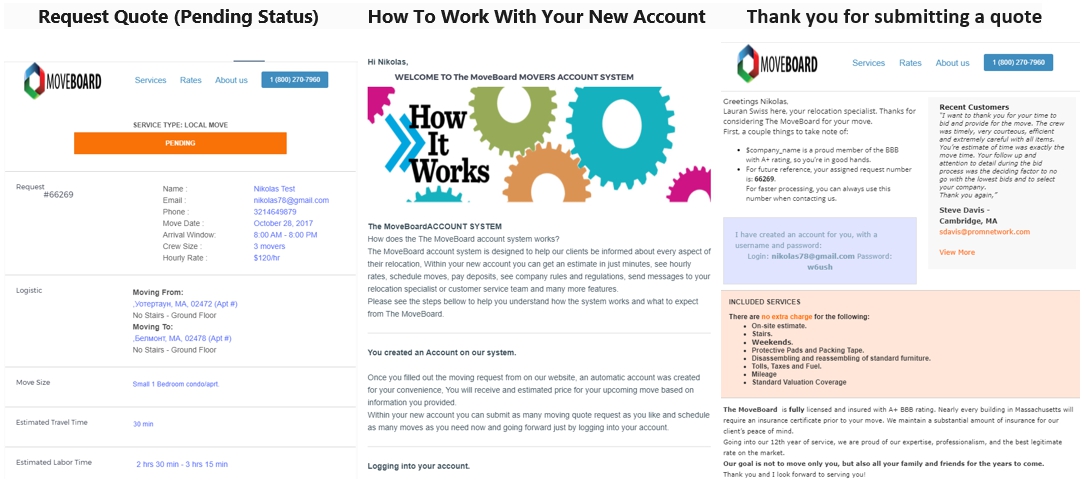
 After this your Client receives 3 Notification Emails by default:
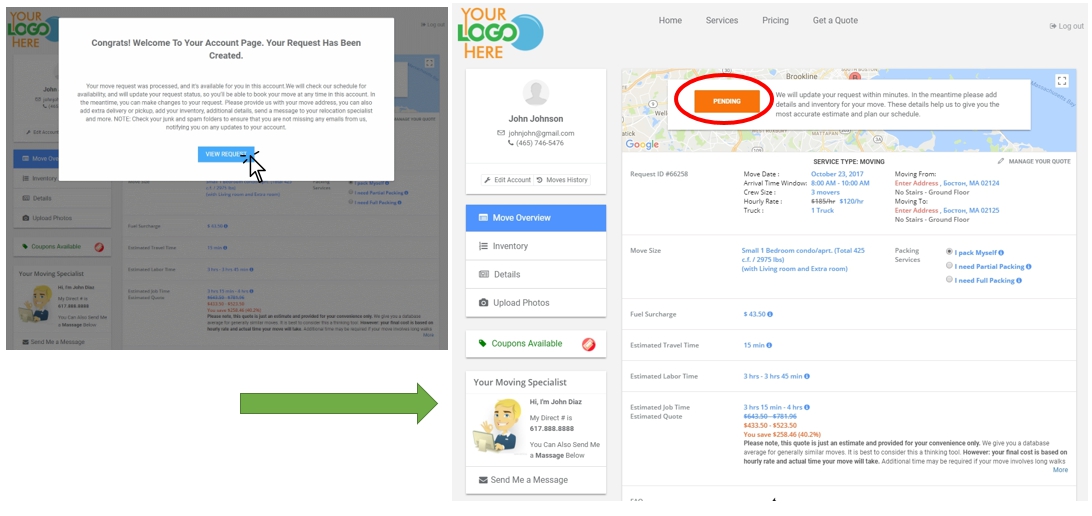
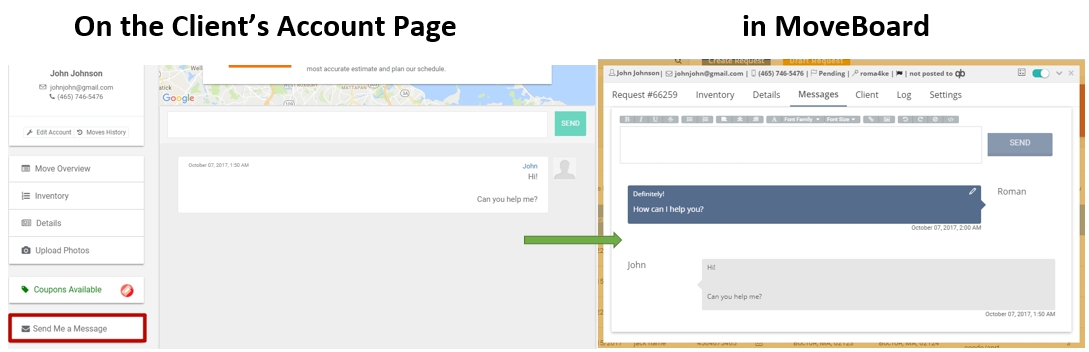
So your Client’s Account Page is created and this is how your Clients see a Pending Status of their Request:
![]() NOTE: At this stage Clients can add or change some valuable information (add Inventory, Details, for instance, distance from door to parking, etc.):
NOTE: At this stage Clients can add or change some valuable information (add Inventory, Details, for instance, distance from door to parking, etc.):
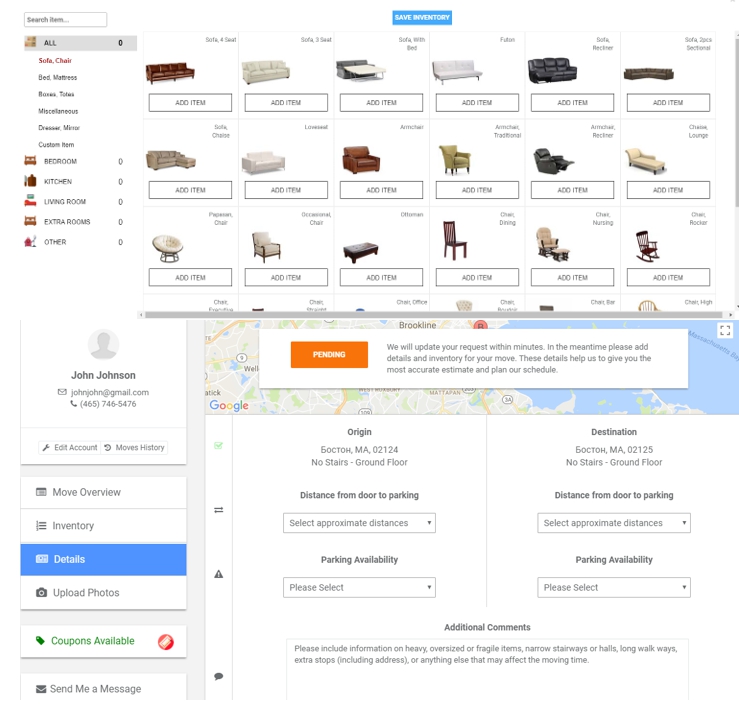
![]() NOTE: Your Clients will also be able to leave Messages from their Account Page which is convenient for straightforward communication between them and Sales People:
NOTE: Your Clients will also be able to leave Messages from their Account Page which is convenient for straightforward communication between them and Sales People:
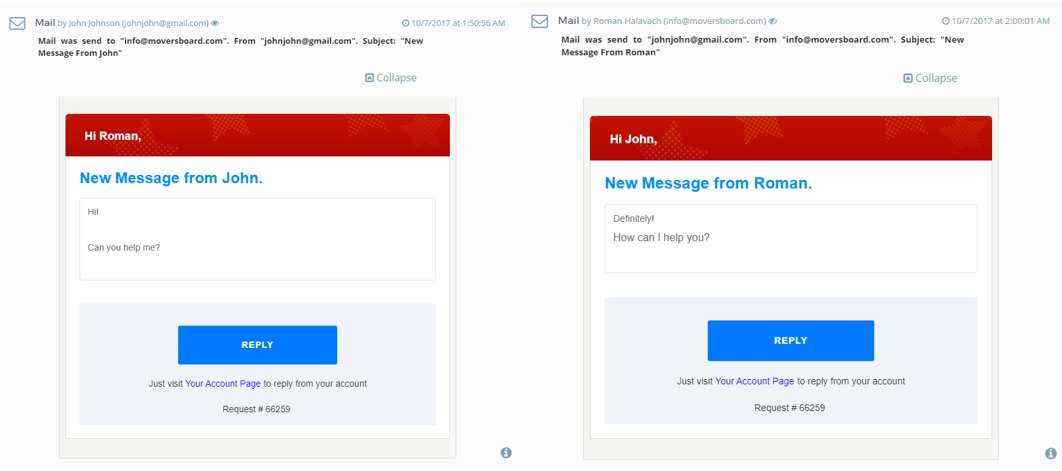
When there is messaging between a Client and a Sales Person they also get Notification Emails about New Messages:
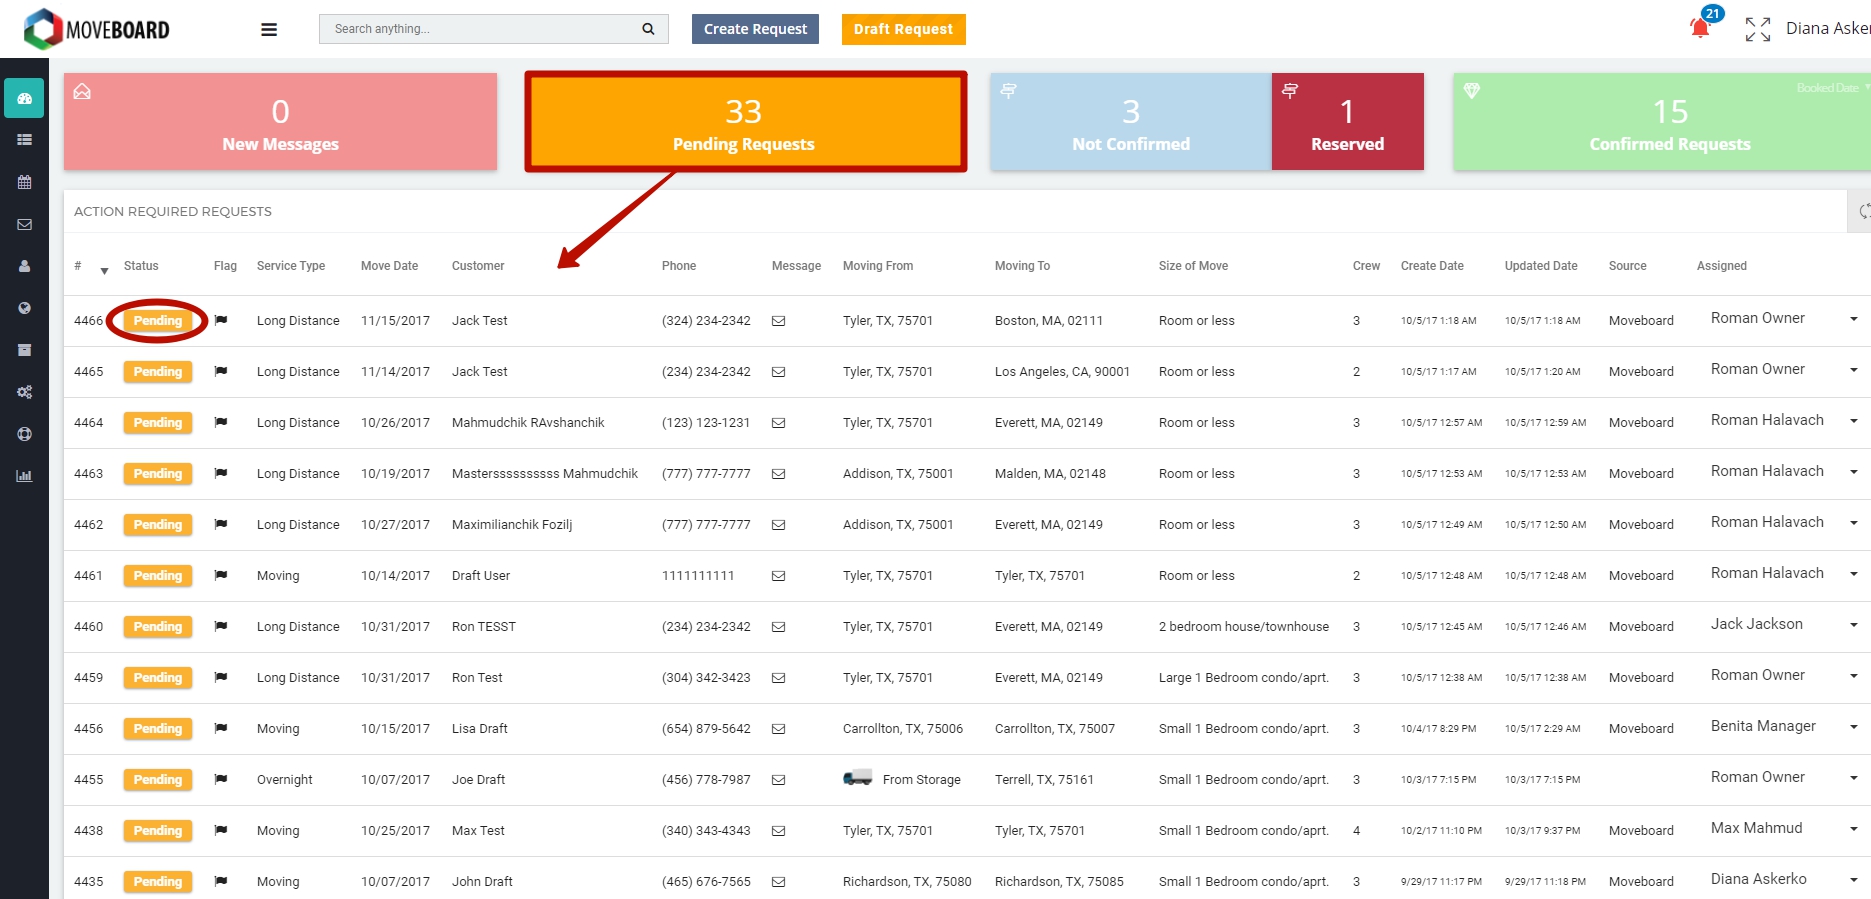
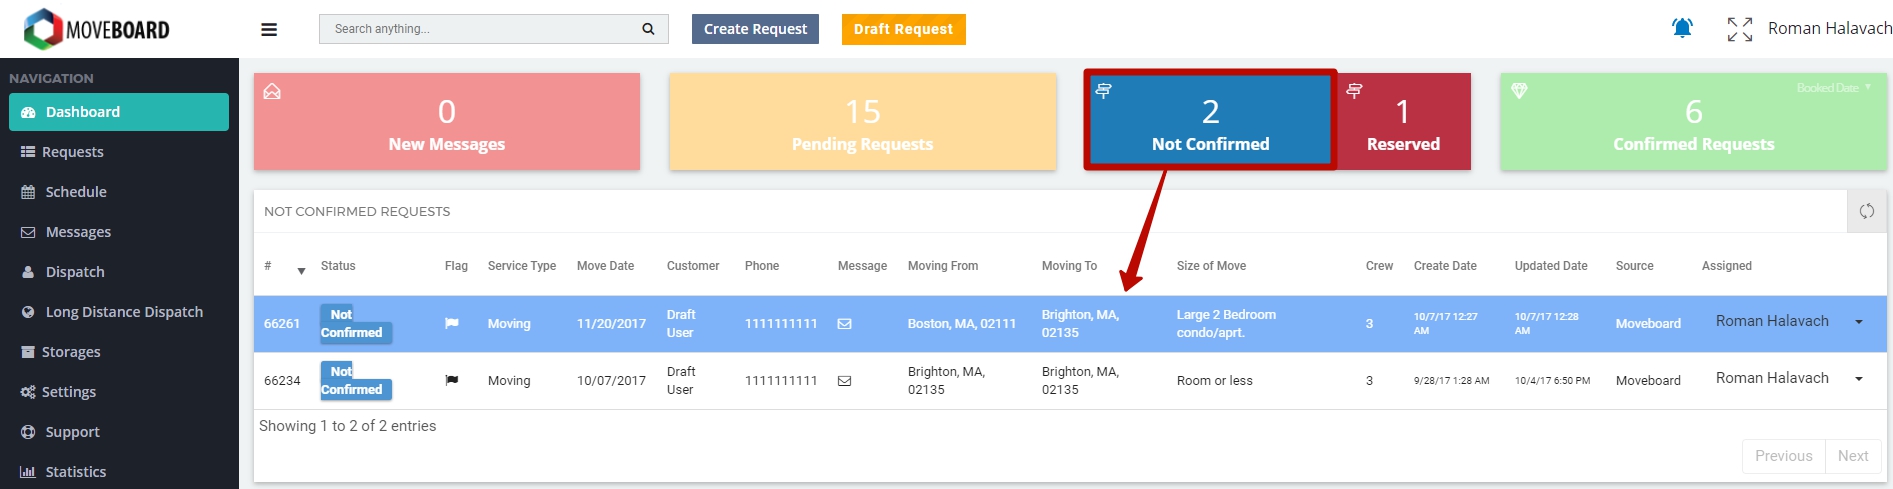
You will see the created Request on the Dashboard like this:
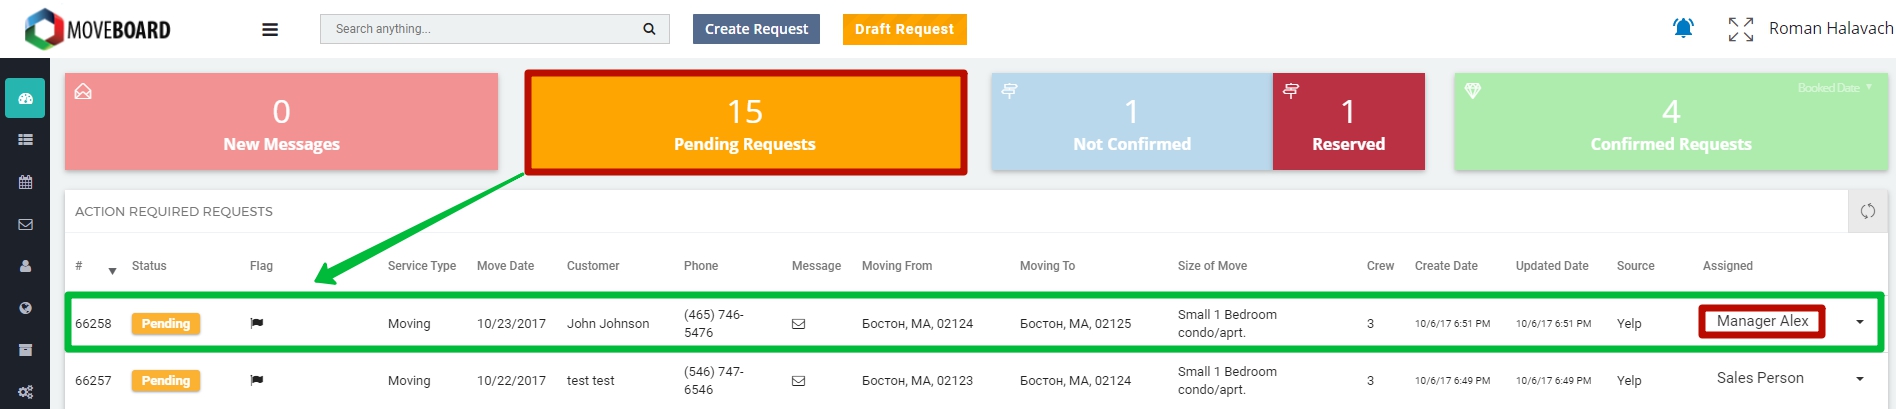
NOTE: Here you can assign a person responsible for the Job.
 What Should I Do Next?
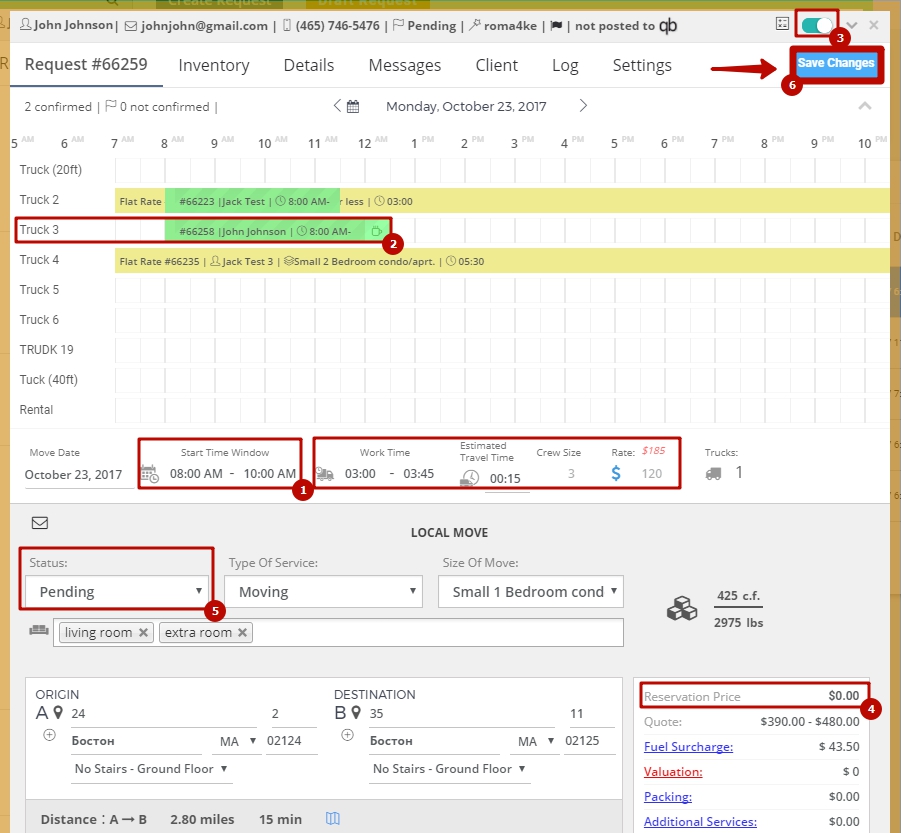
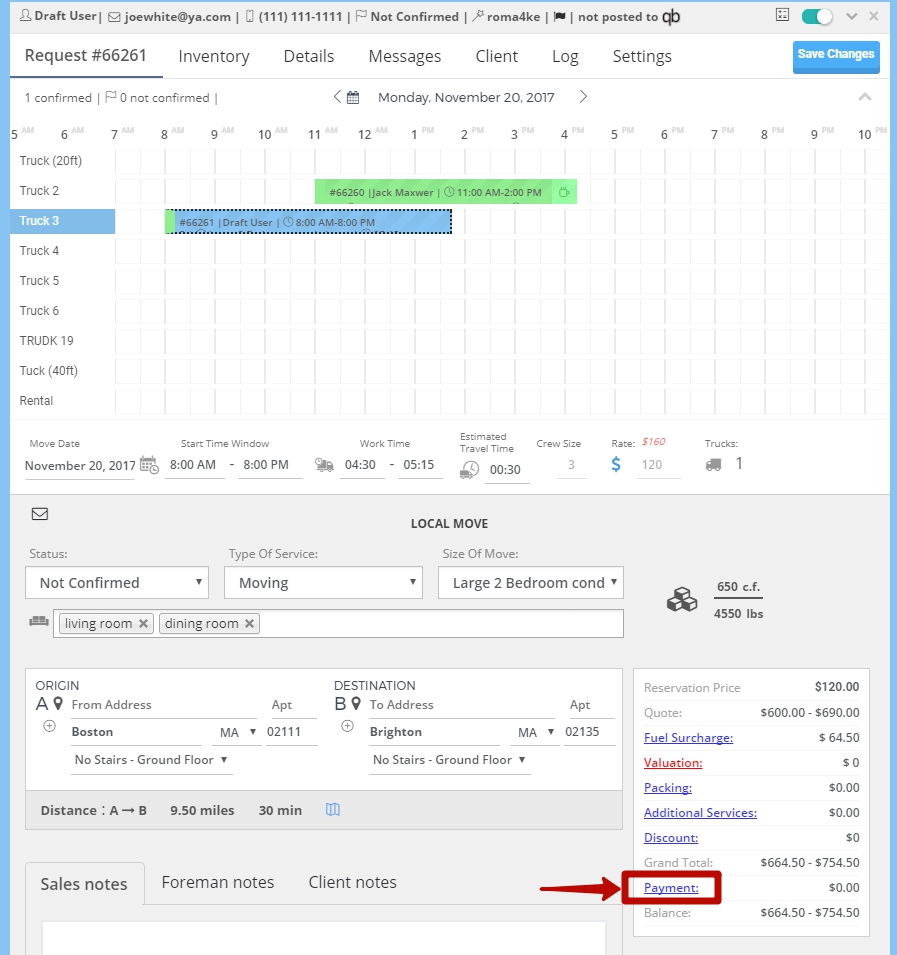
1. Open the Request by double-clicking on it.
2. Make the necessary changes in the Request, for instance:
2.1. Start time window (minimize it to make it more convenient for you and your Client);
2.2. Choose a Truck for the Job;
2.3. Check Work Time, Estimated Travel Time, Crew Size and Rate (if you want to change it you have to turn automation off);
2.4. You can change Reservation Price (if needed);
When everything is ready:
2.5. Change the Status to Not Confirmed;
2.6. Click on Save Changes:
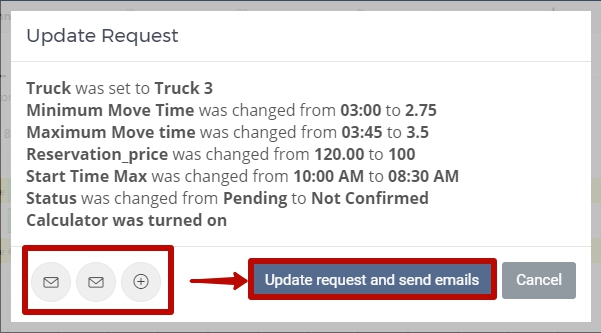
3. NOTE: In the newly opened window look through all the changes that were made, add/delete emails that your Client is going to receive (in this case by default they receive YOUR MOVING DATE IS AVAILABLE and Request Local Quote (Not Confirmed Status) emails).
Click on Update request and send emails:
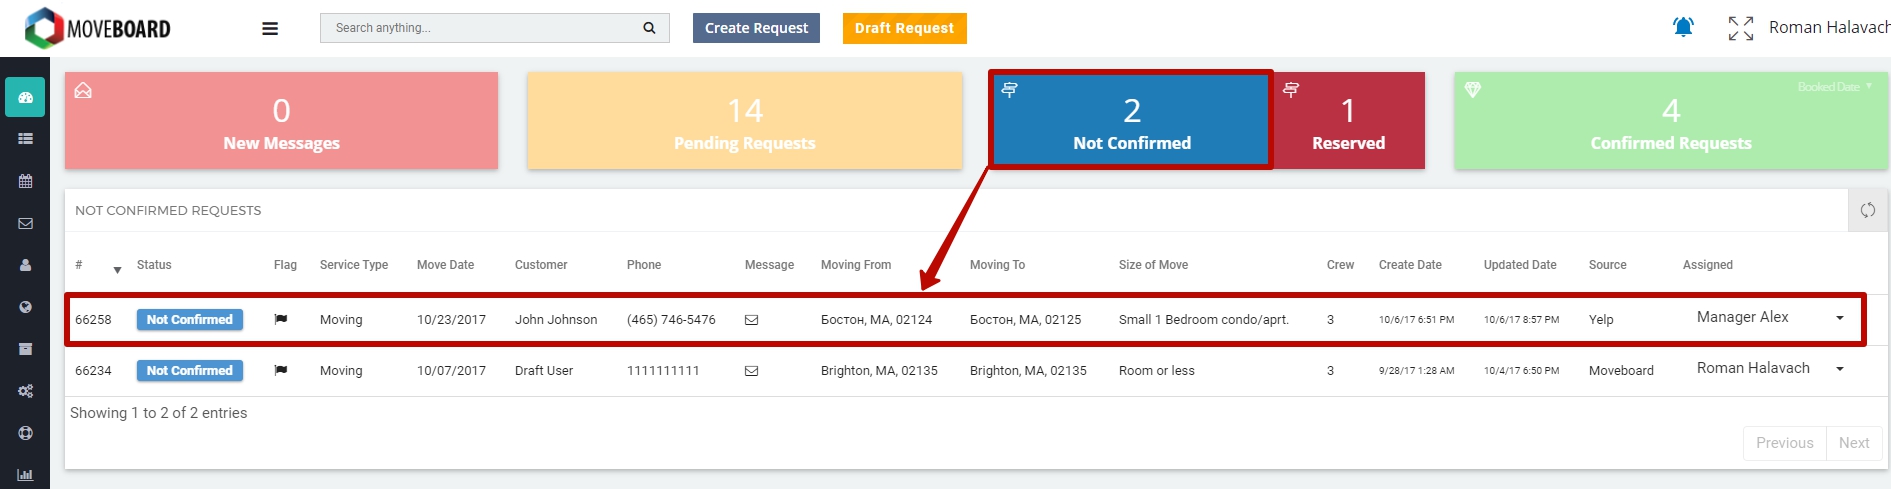
As soon as you do this the Request is transferred to Not Confirmed Requests

![]() NOTE: Here are the 2 Emails that your Clients receive by default (in order to see them in the Request form go to Log tab > find the Email you are interested in > click on Expand):
NOTE: Here are the 2 Emails that your Clients receive by default (in order to see them in the Request form go to Log tab > find the Email you are interested in > click on Expand):

Not Confirmed Requests
Now you can see your Request in the tab with Not Confirmed Requests:
This is how your Clients see Not Confirmed Status on their Account Page:
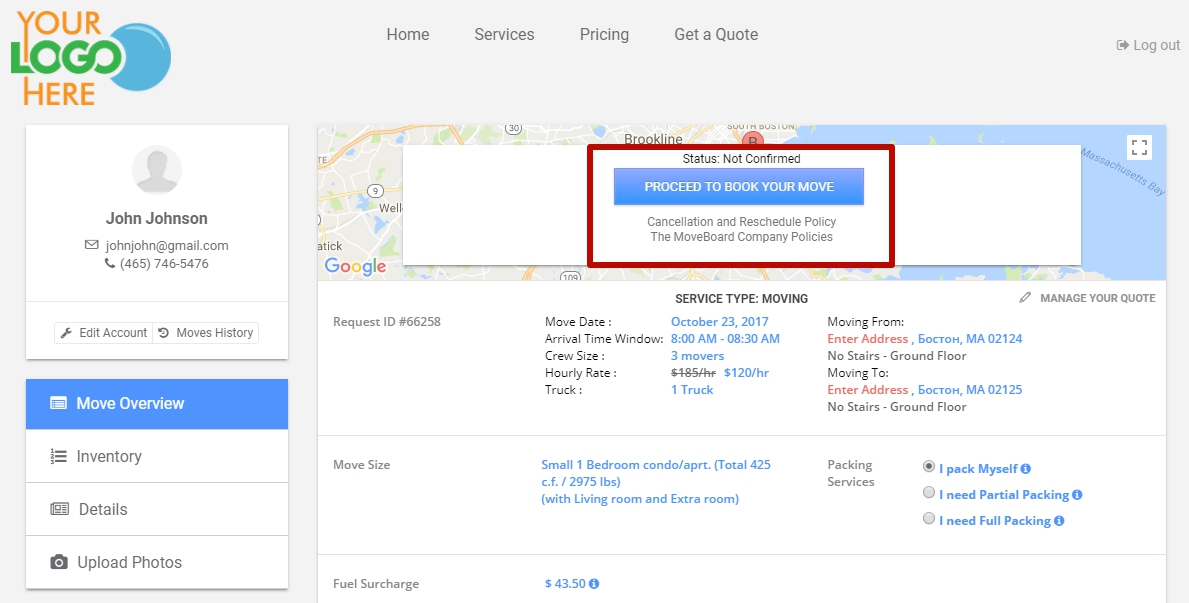
What is Next?
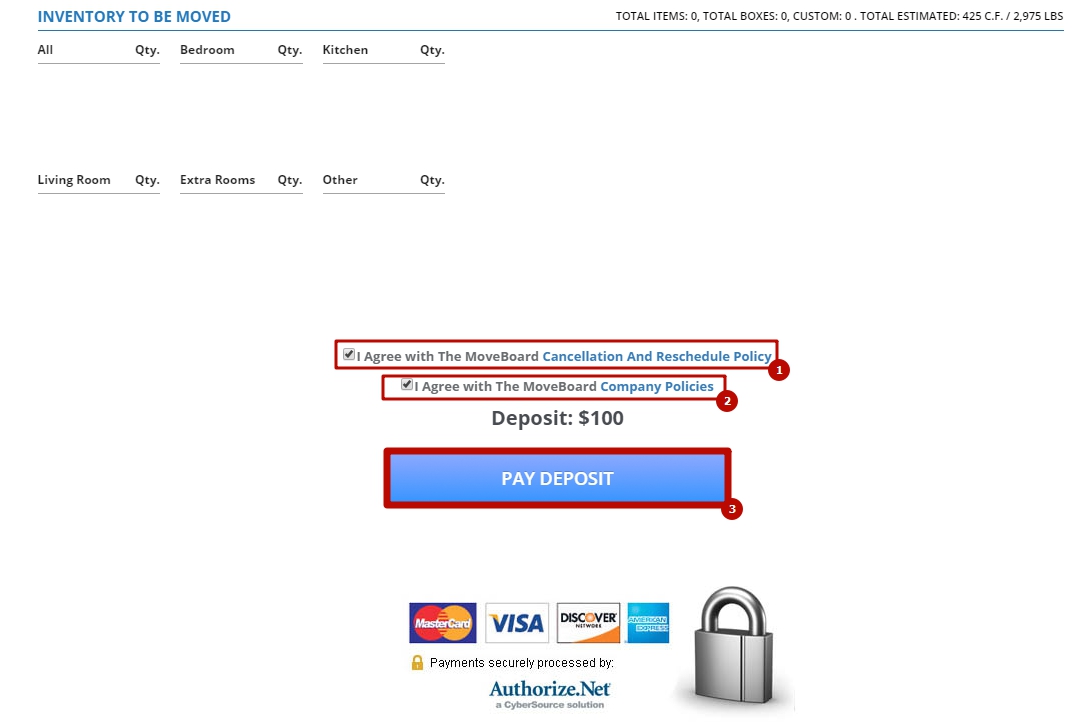
1. After an Email was sent to the Client they are supposed to book the move by clicking on PROCEED TO BOOK YOUR MOVE. Doing so they will get to the Confirmation Page:
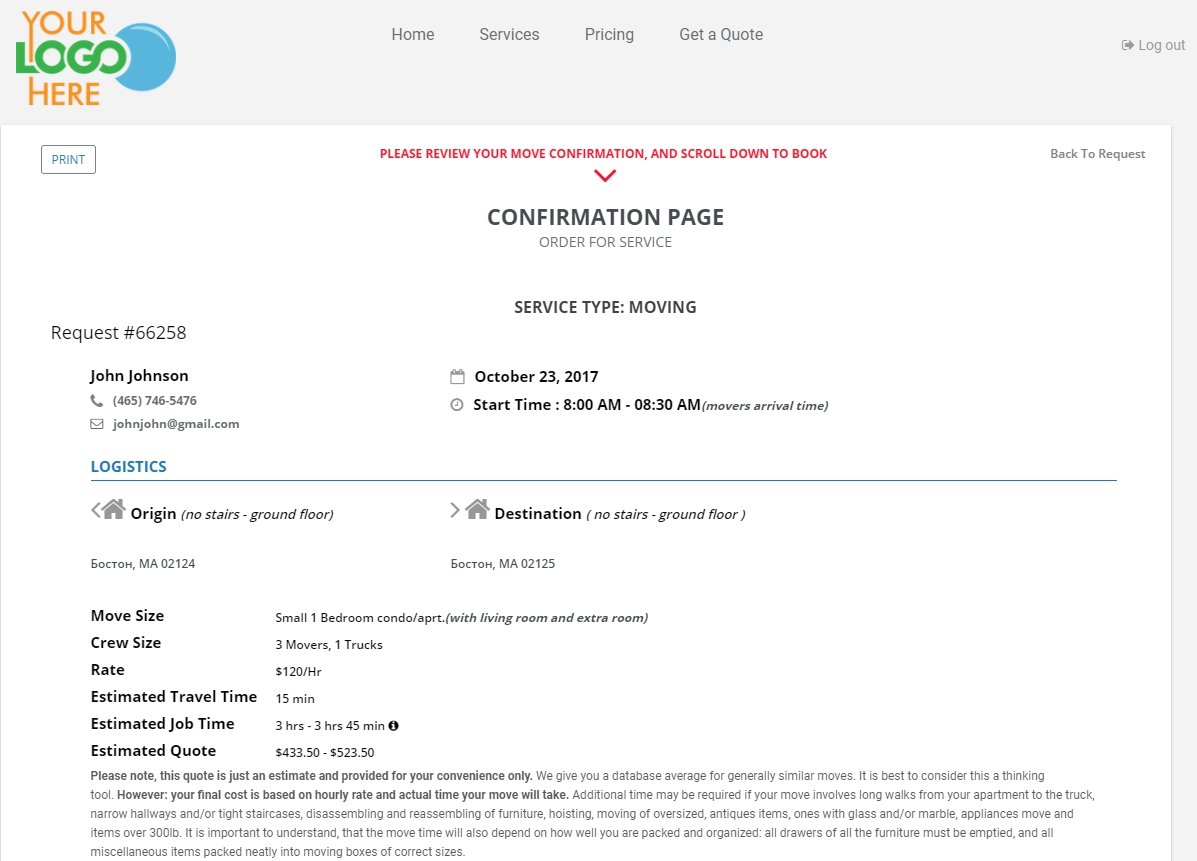
2. After checking everything and if your Client is ready to book the move they have to scroll down the page, put ticks next to “I Agree with Cancellation And Reschedule Policy“and “I Agree with Company Policies” and click on PAY DEPOSIT:
![]() NOTE: If you do not charge a reservation fee at the bottom of the Confirmation Page your Client will have to click on CONFIRM RESERVATION > add exact addresses of the move > put a signature.
NOTE: If you do not charge a reservation fee at the bottom of the Confirmation Page your Client will have to click on CONFIRM RESERVATION > add exact addresses of the move > put a signature.
After that the Request will be transfered to Confirmed Requests.
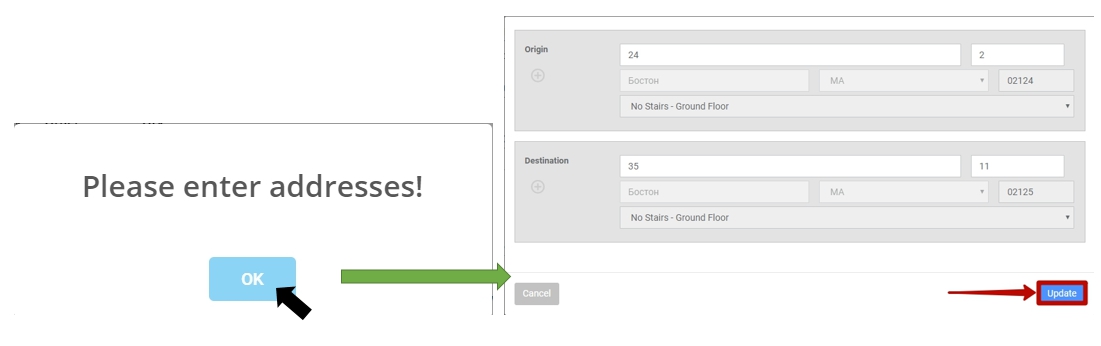
![]() NOTE: To pay deposit the Client has:
NOTE: To pay deposit the Client has:
- To add exact addresses of ORIGIN and DESTINATION, click on Update:
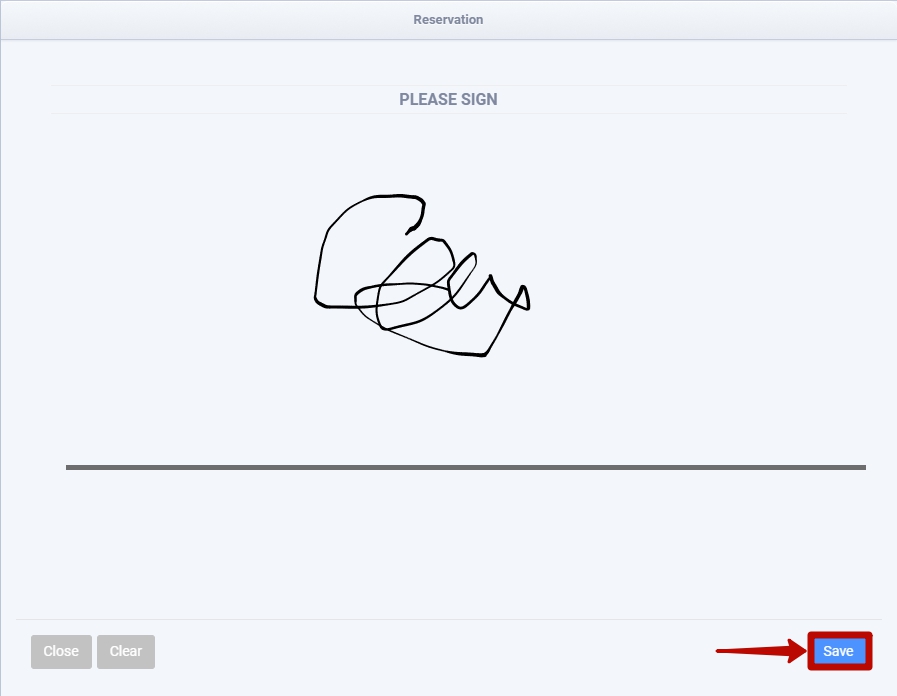
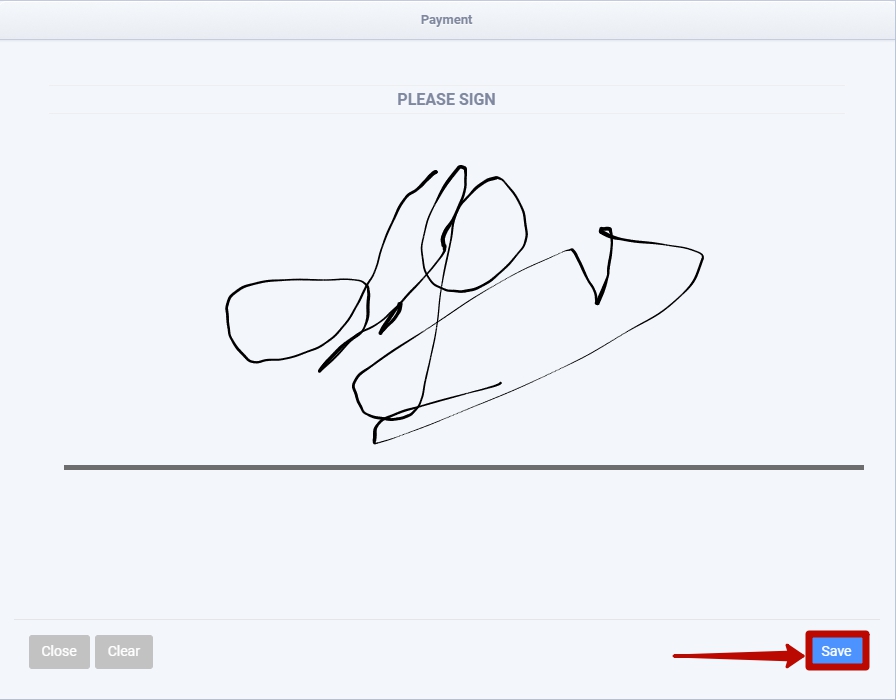
- The Client has to put their signature confirming that they accept all conditions of a quote and click on Save:
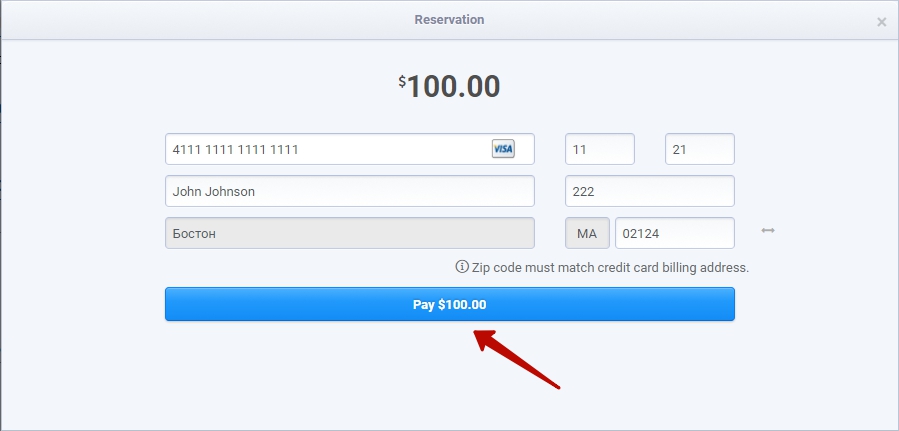
- Fill in a form and click on Pay:
As soon as the payment was made the Request is transferred to Confirmed Requests
![]() NOTE: Here are the 2 Emails that your Clients receive by default (“Request Local Quote (Confirmed)” and “YOUR MOVE IS CONFIRMED AND SCHEDULED!”. In order to see them in the Request form go to Log tab > find the Email you are interested in > click on Expand):
NOTE: Here are the 2 Emails that your Clients receive by default (“Request Local Quote (Confirmed)” and “YOUR MOVE IS CONFIRMED AND SCHEDULED!”. In order to see them in the Request form go to Log tab > find the Email you are interested in > click on Expand):
*Reserved Requests
There can always be a situation when, for instance, your Client gives you a call and wants to pay deposit by phone.
In this case:
- Find the necessary Request in Not Confirmed Requests:
- Open the Request by double-clicking on it and click on Payment in the Payment box:
- In the newly opened window click on Reservation Charge > Payment Info > fill in a form and click on Pay $*** > Close a Receipt > click on OK:
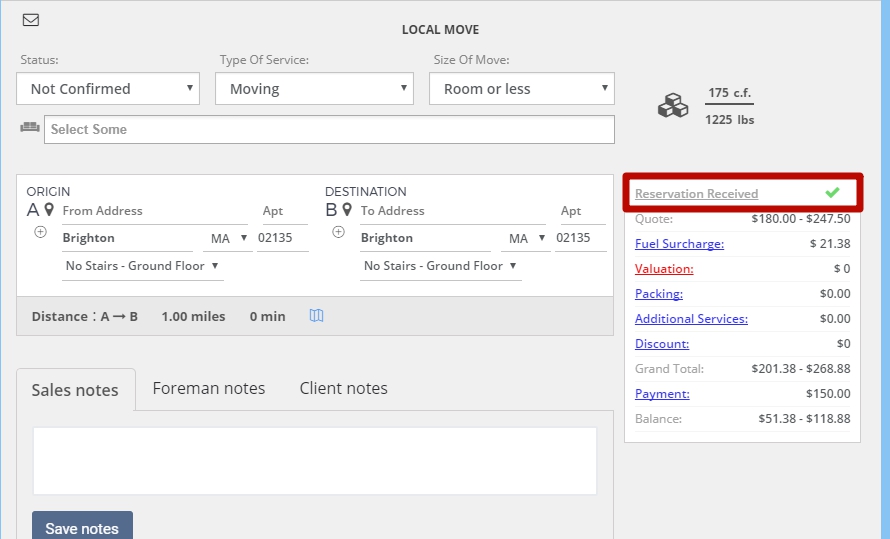
 NOTE: In the Request form you will see that the Reservation payment was Received:
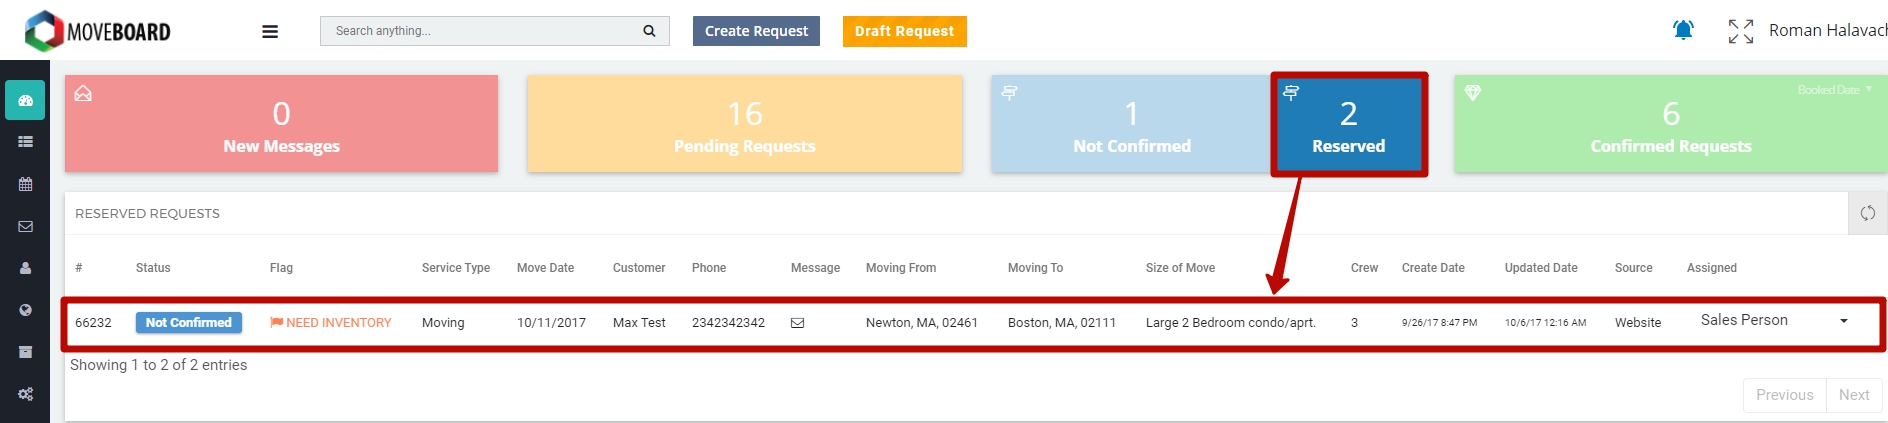
 Now you will see the Request in Reserved Requests:
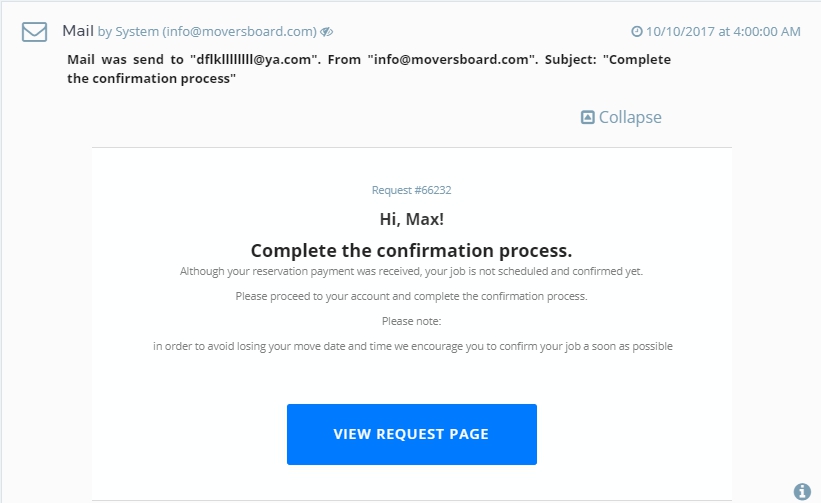
![]() NOTE: At this stage your Client receives an Email “Complete the confirmation process” as a Reminder saying that the job has not been scheduled and confirmed yet:
NOTE: At this stage your Client receives an Email “Complete the confirmation process” as a Reminder saying that the job has not been scheduled and confirmed yet:
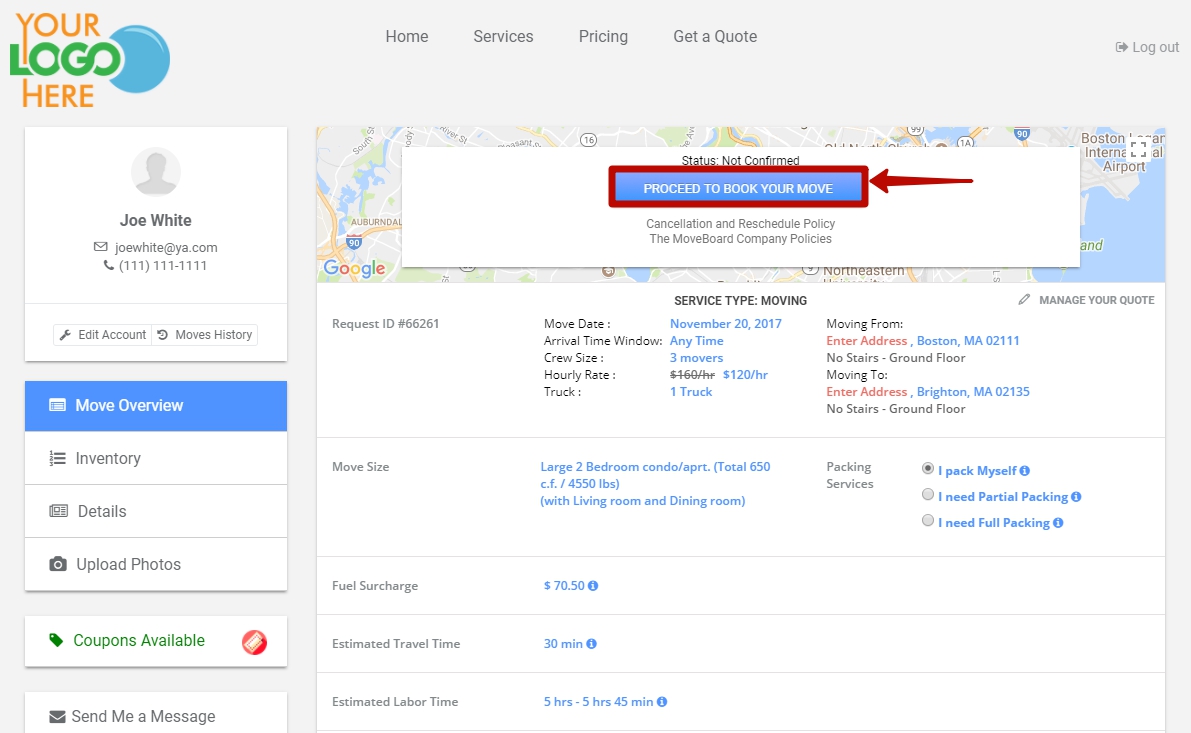
4. Your Client on their Account Page has to click on PROCEED TO BOOK YOUR MOVE:
5. They get to Confirmation Page > put ticks next to “I Agree with Cancellation And Reschedule Policy“and “I Agree with Company Policies” > click on CONFIRM RESERVATION:
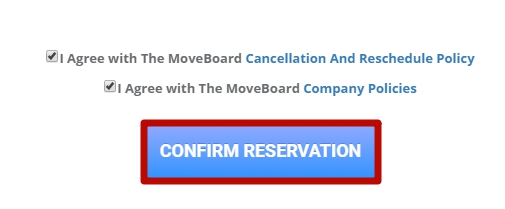 6. Add exact addresses of ORIGIN and DESTINATION, click on Update:
7. The Client has to put their signature confirming the payment and click on Save:
After this the Request is transferred to Confirmed Requests
Confirmed Requests
The Request is Confirmed after your Client books the move. Starting from this point the Client cannot change any valuable information in the Request.
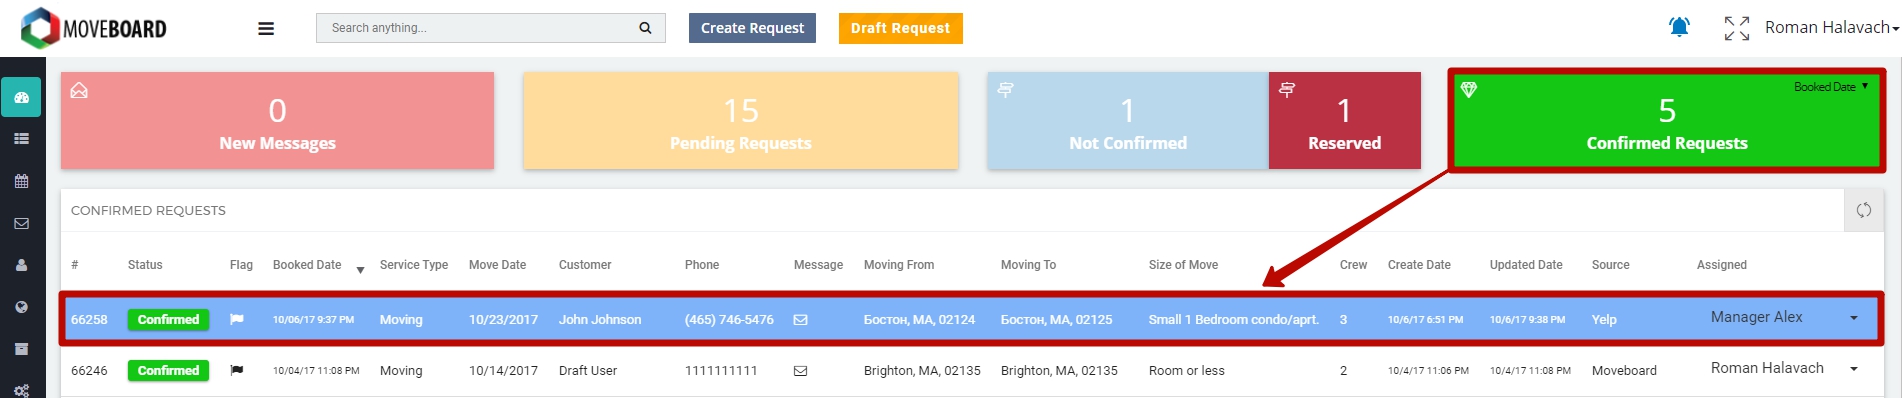
This is how you see the Request in MoveBoard:
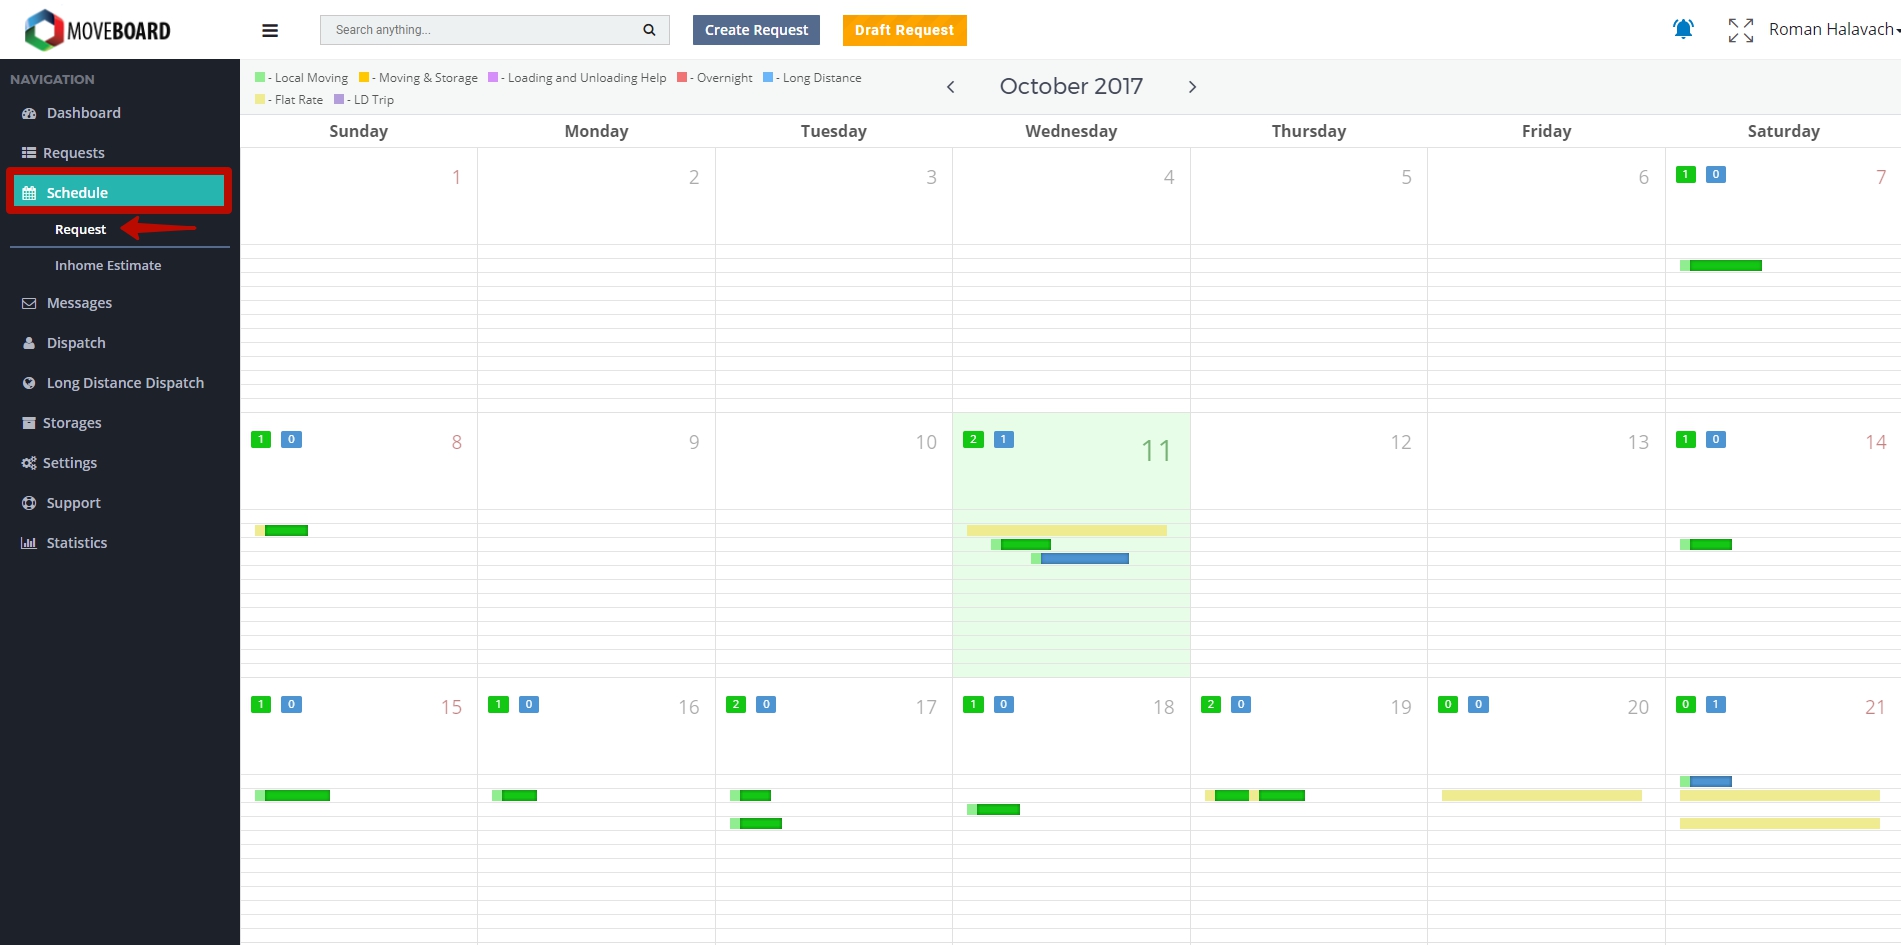
![]() NOTE: You can sort Confirmed Requests by Booked Date and Move Date:
NOTE: You can sort Confirmed Requests by Booked Date and Move Date: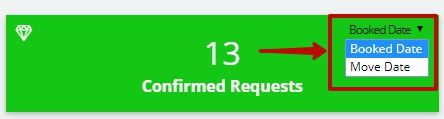
- If you choose “Booked Date” you see the Requests that were booked in the current month.
- If you choose “Move Date” you see the Jobs you have to do in the cuttent month.
That is why the number of Confirmed Requests in “Booked Date” and “Move Date” can be different.
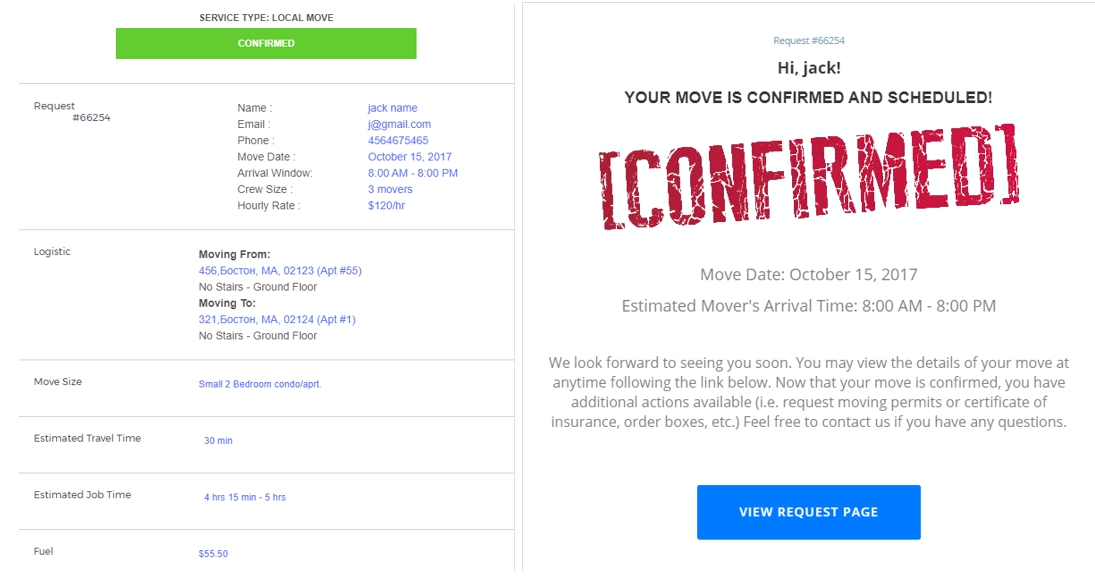
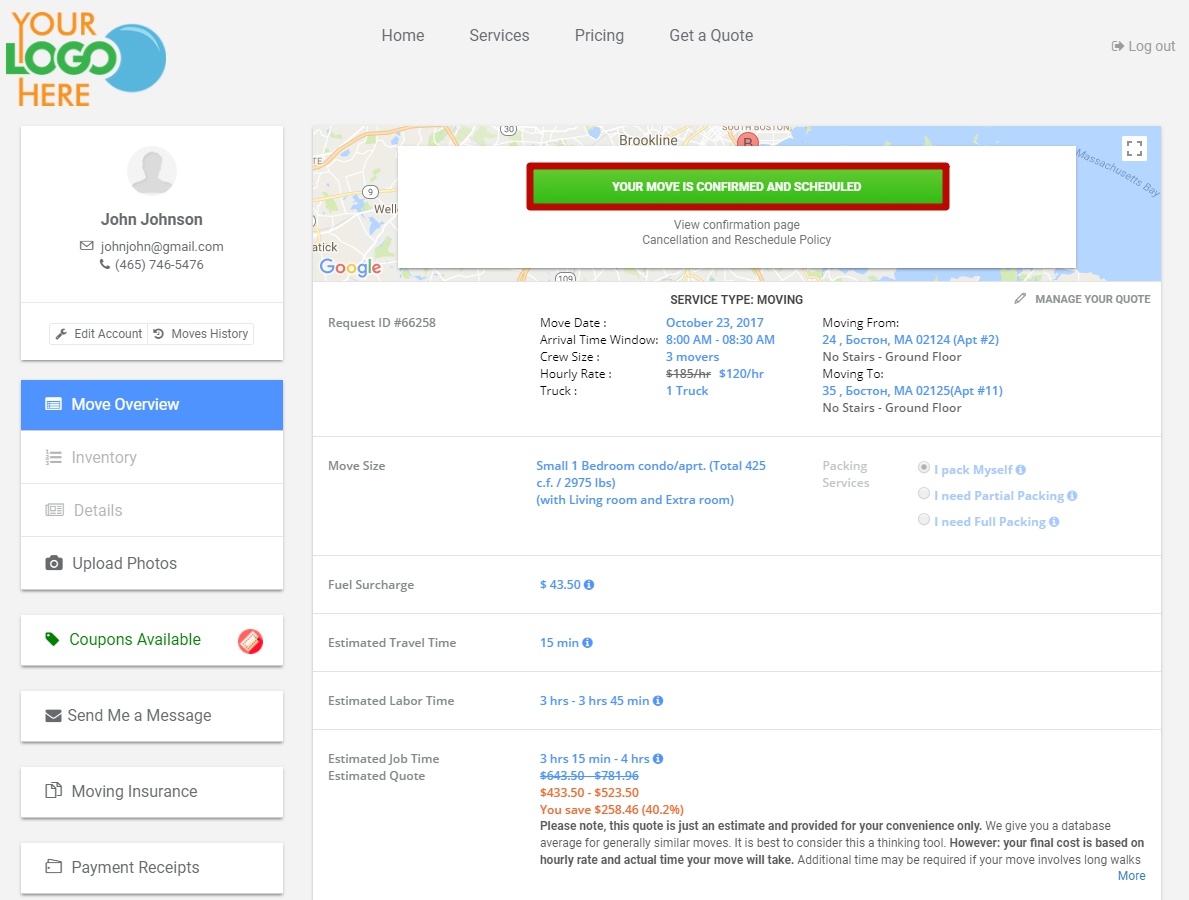
This is your Client’s view of their booked Move:
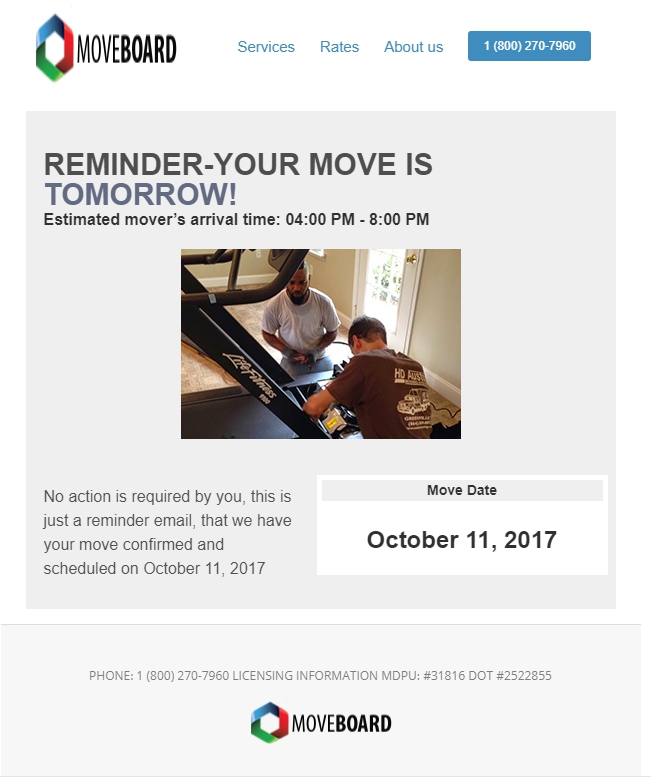
![]() NOTE: This is an example of an Email Reminder your Client receives the day before the move:
NOTE: This is an example of an Email Reminder your Client receives the day before the move: