To make Account Page Settings go to Settings > Account Page:
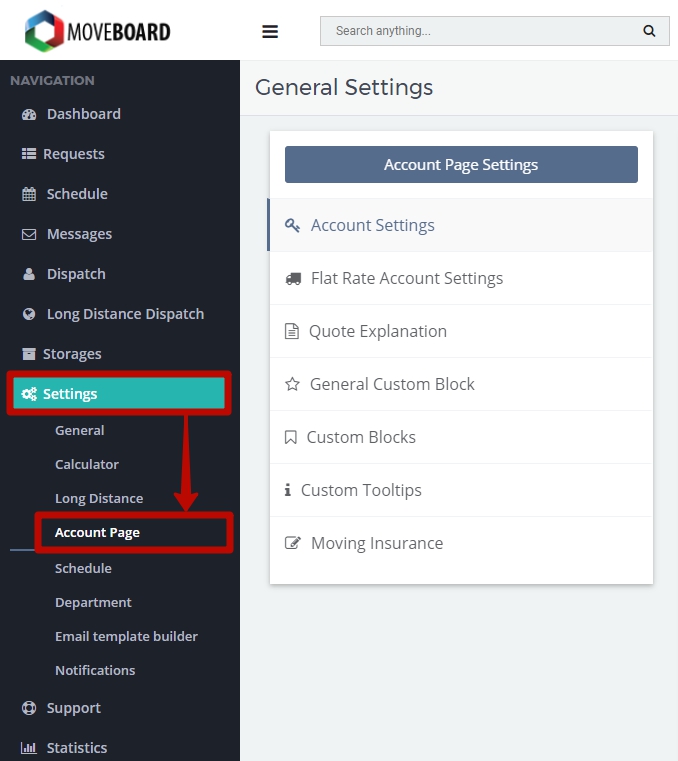
There are several tabs that you have to make settings for:
- Account Settings;
- Flat Rate Account Settings;
- Quote Explanation;
- General Custom Block;
- Cuctom Blocks;
- Custom Tooltips;
- Moving Insurance.
1. Account Settings
In this section you can make Greeting Settings in 3 tabs:
- New User Greeting;
- Parser Greeting;
- Flat Rate Greeting.
The text can be changed in accordance with your preferences:
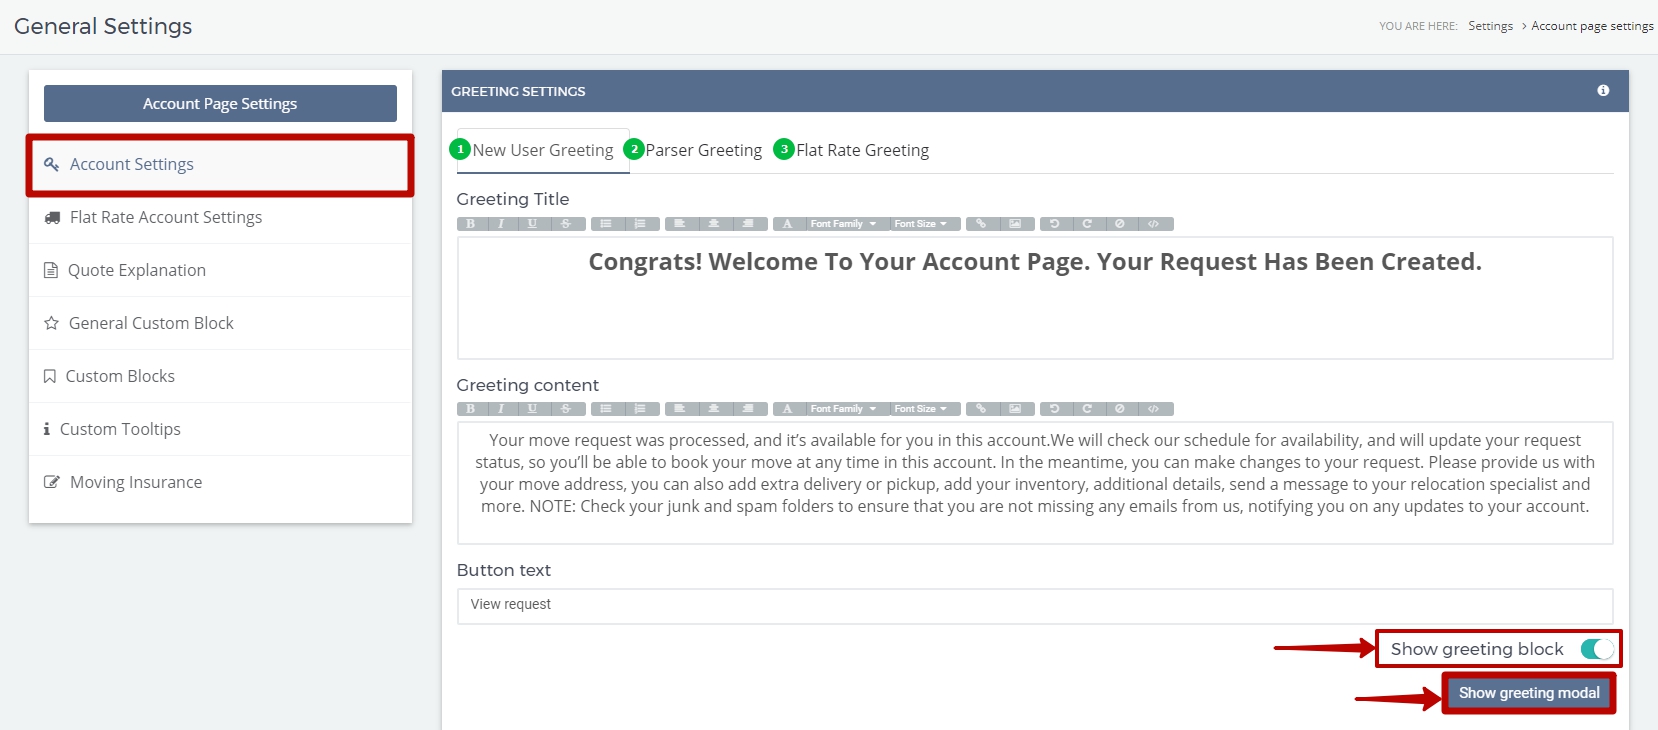

NOTE: If you want your Client to see a Greeting on their Account Page turn on Show greeting block function.
NOTE: You can also preview how your Greeting is going to look like. For this click on Show greeting modal.
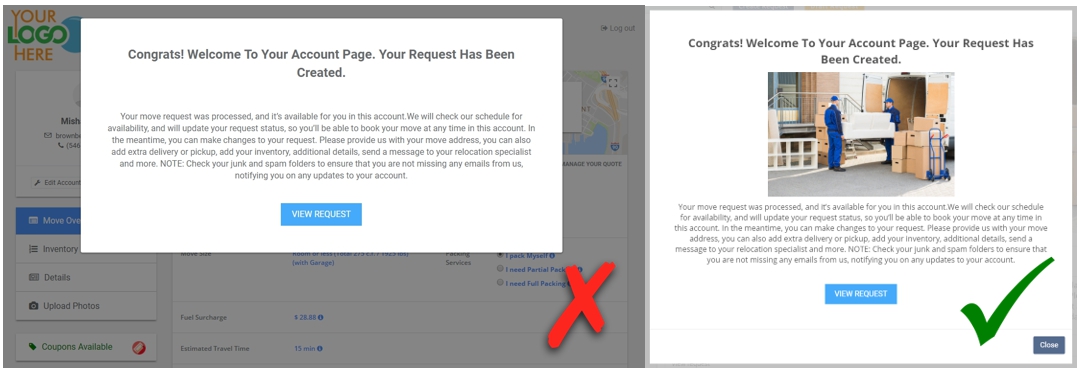
This is how your Clients will see a Greeting on their Account Page:
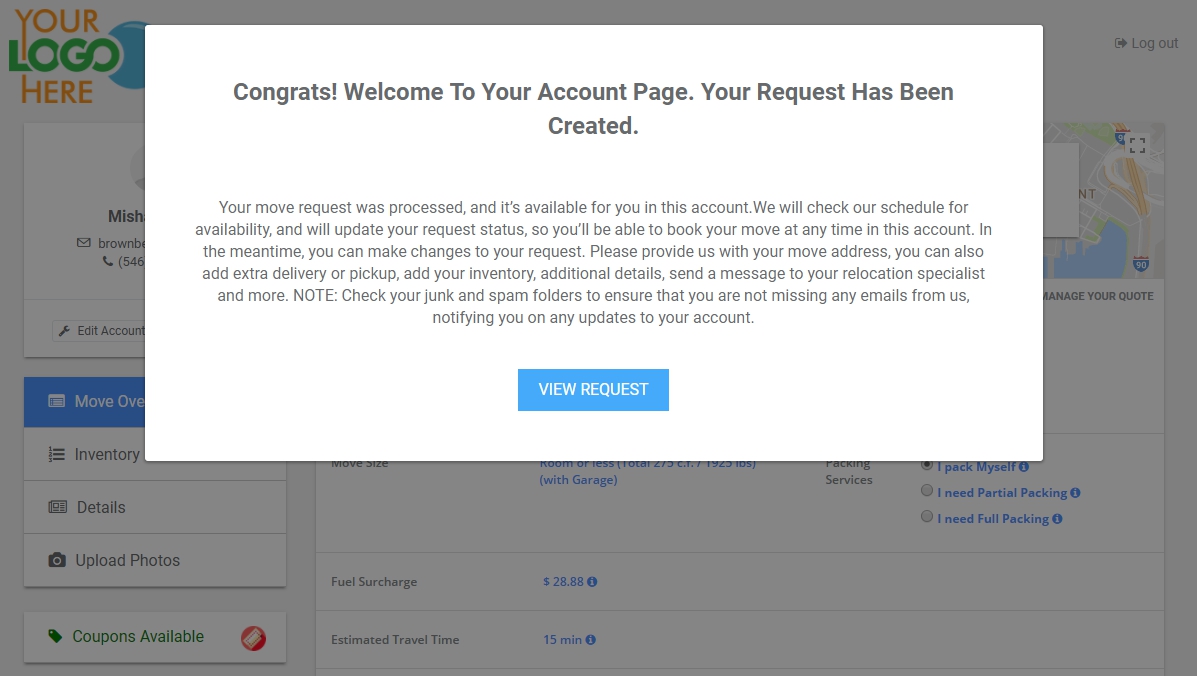
NOTE: We always suggest adding real photos of yours into a Greeting to catch the Client’s eye and increase their trust and interest for your company.
Compare:
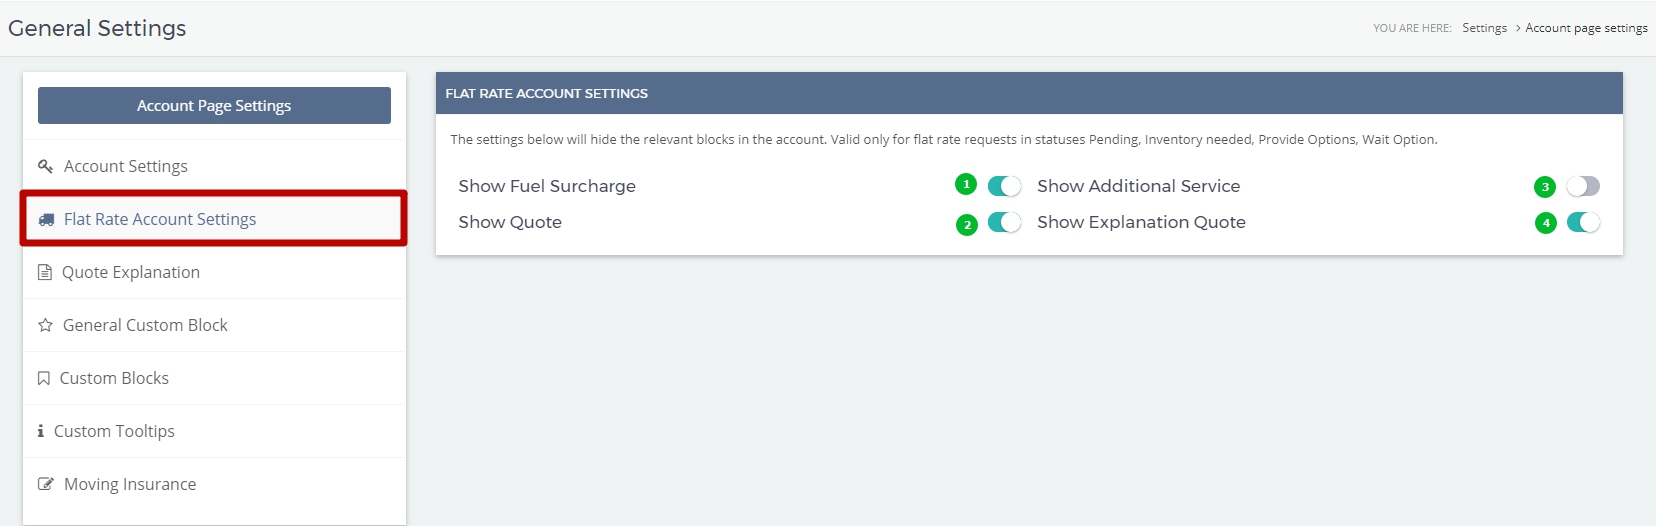
2. Flat Rate Account Settings
In this section there are 4 relevant blocks that can be shown or hidden on your Client’s Account Page. They are valid for Flat Rate Requests in statuses Pending, Flat Rate (Inventory Needed), Flat Rate (Provide Options), Flat Rate (Wait Option):
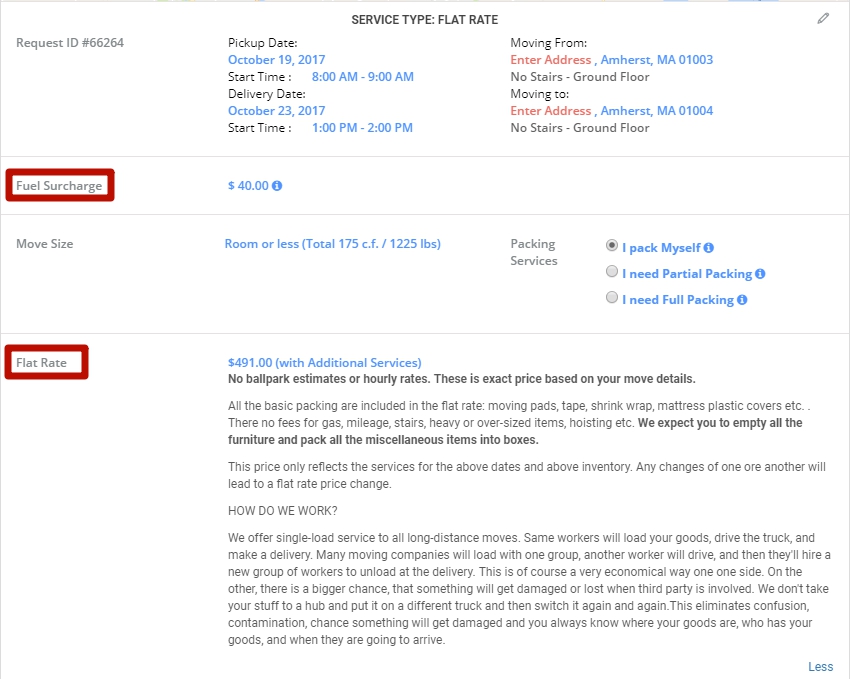
Your Client on their Acoount Page can see the blocks like this:
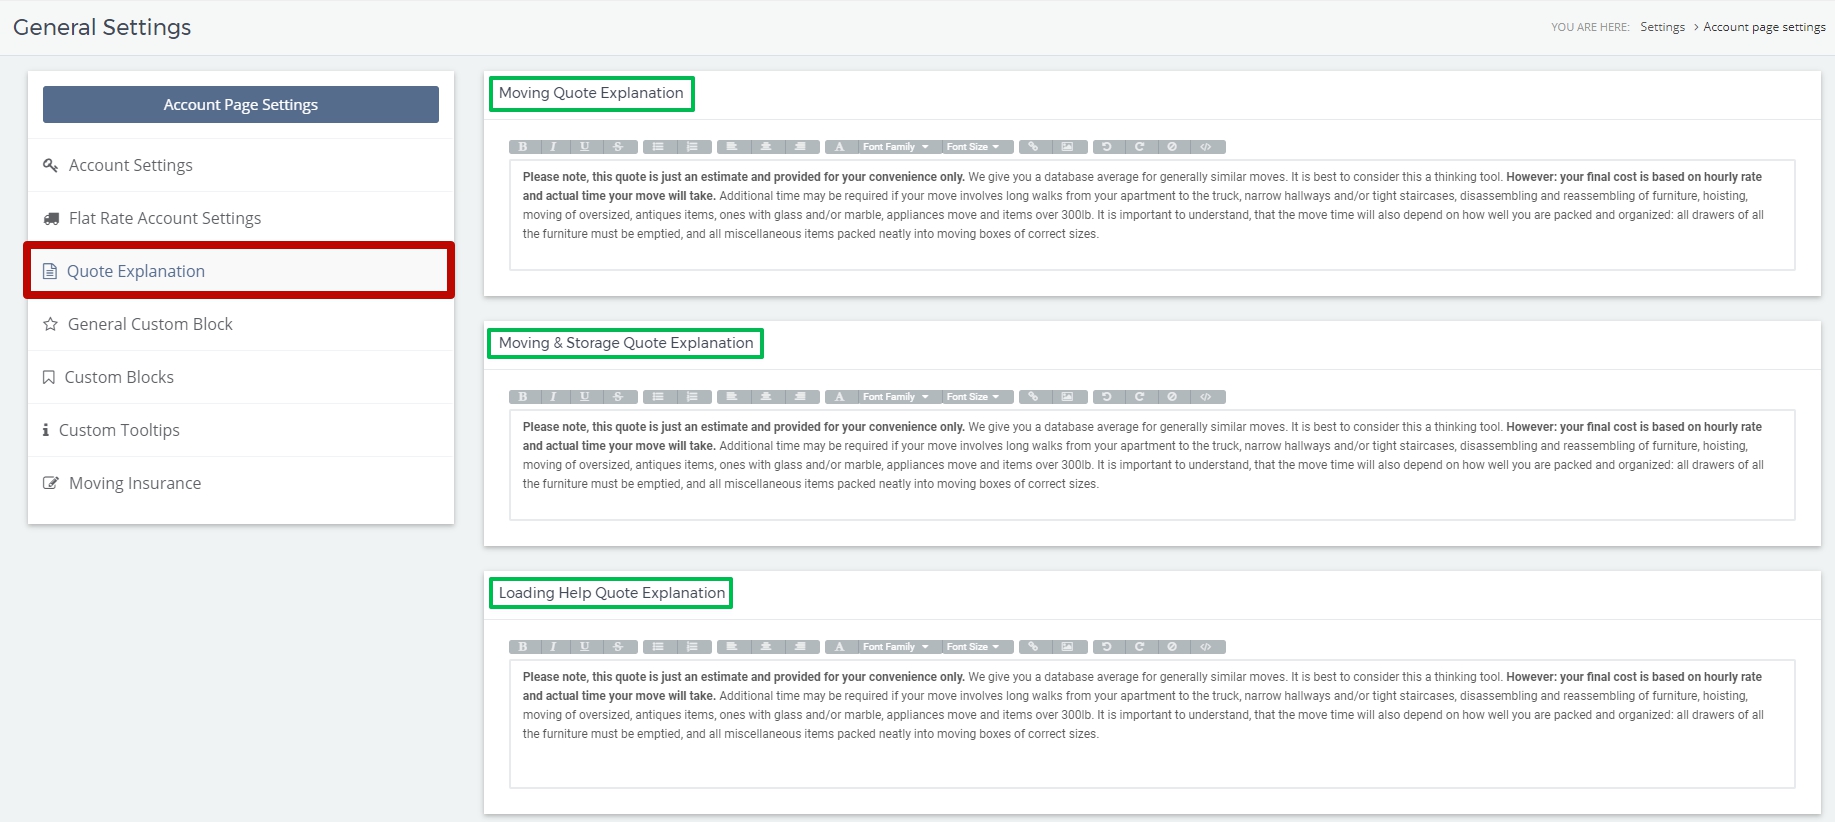
3. Quote Explanation
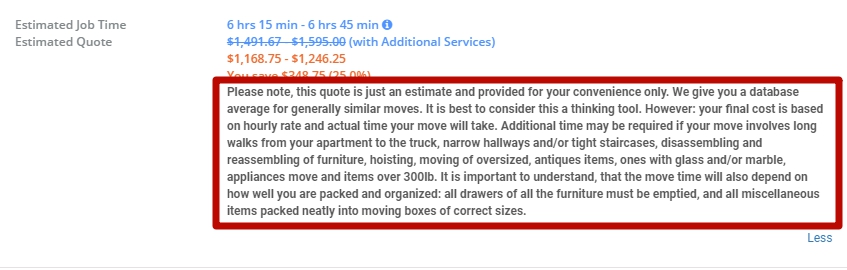
Here you can give your own Explanation of a Quote for all types of Services you provide:
The Clients on their Account Page see it in the following way:
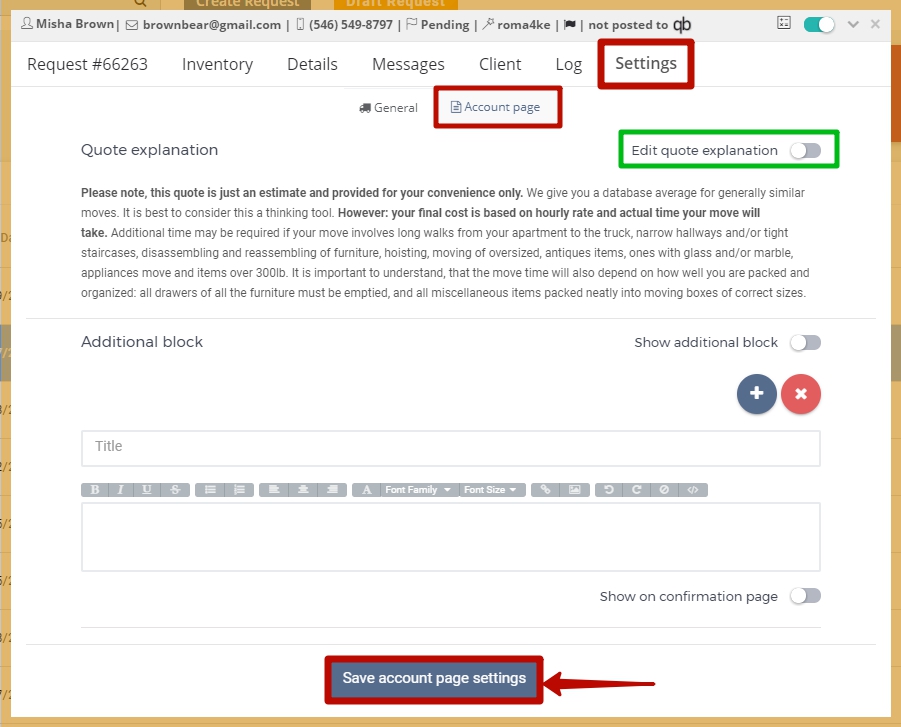
![]() NOTE: You can also edit quote explanation if it is different from a regular one for a specific Request.
NOTE: You can also edit quote explanation if it is different from a regular one for a specific Request.
To do this go to the Request Form > Settings > Account Page. DO NOT FORGET to click on Save account page settings:
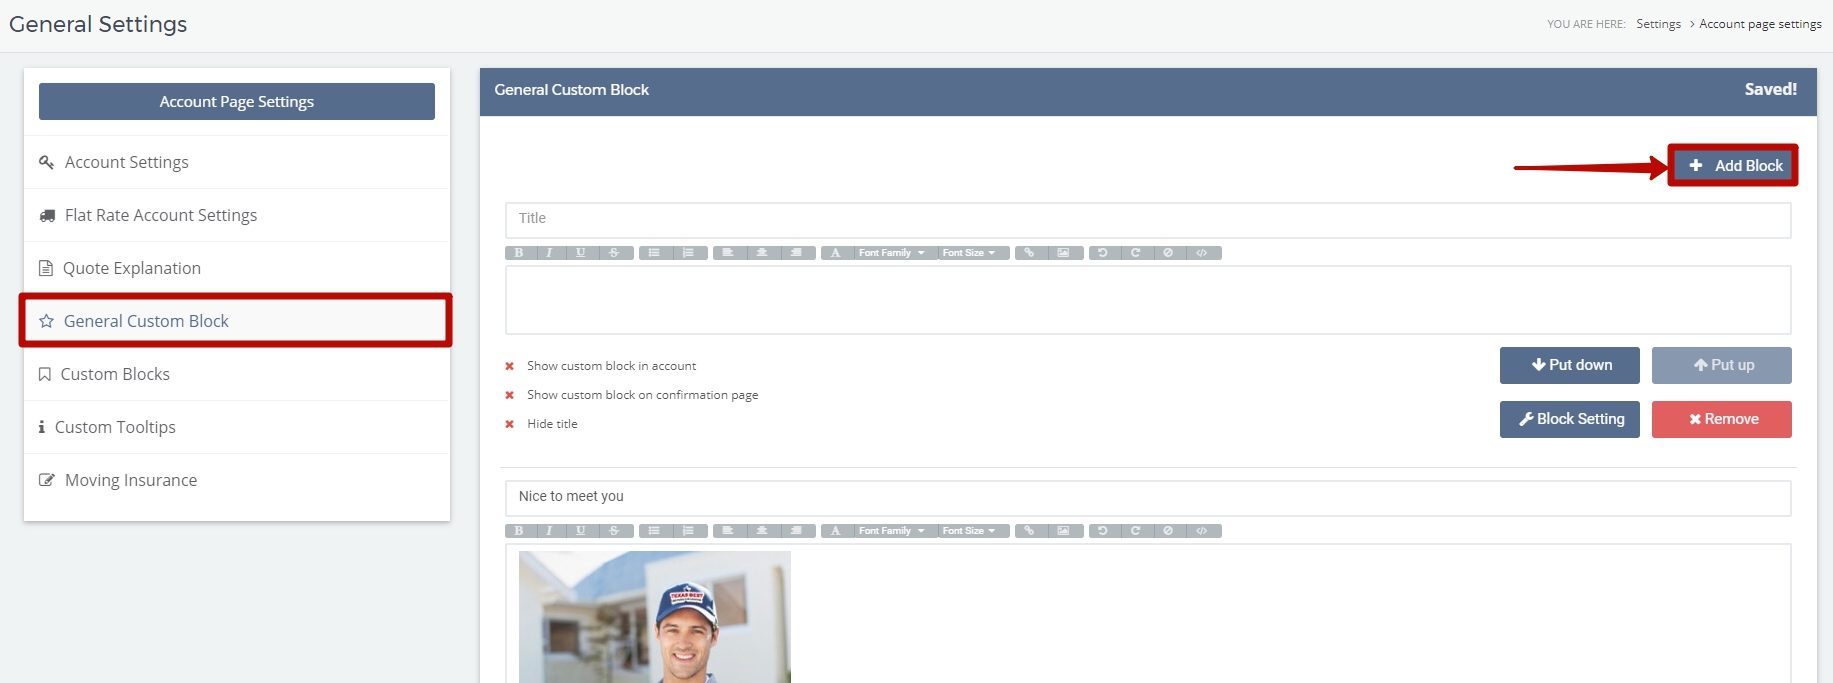
4. General Custom Block
In this section you can design additional blocks you want to fill your Client’s Account Page with, for instance, to show that you are worth trusting.
For this click on Add Block:
Then:
- Add the Title of the Block (for instance, About Us);
- Add the necessary filling of the Block (a text or an image);
- Make Settings for the Block by clicking on Block Settings (choose service types and request statuses, when the Block will be seen and where you want to show the Block (in account, on the confirmation page), you can also hide the title);
- Choose a certain sequence of blocks (click on Put down or Put up):
![]() NOTE: If you do not need a block anymore click on Remove and it will desappear from your Client’s Account Page.
NOTE: If you do not need a block anymore click on Remove and it will desappear from your Client’s Account Page.
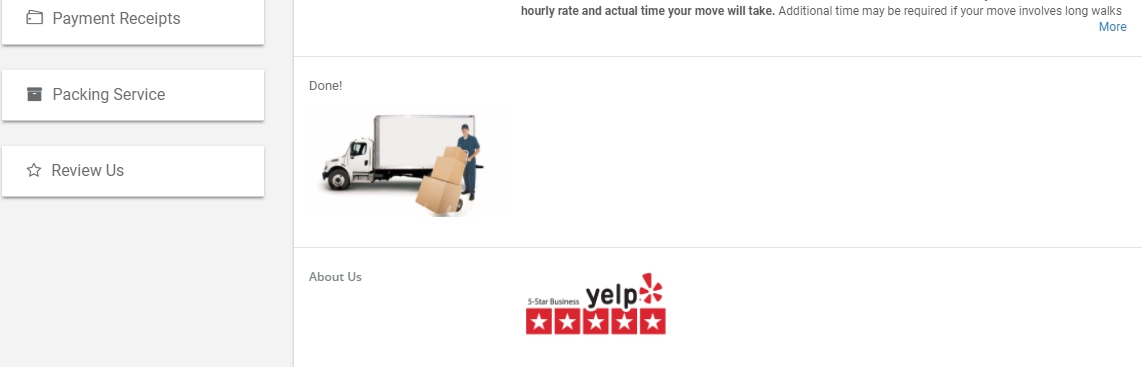
This is your Client’s view of the General Custom Block on their Account Page:

5. Custom Blocks
Custom Blocks Settings give you a possibility to specify information for each type of service you provide (Local Move, Flat Rate, Long Distance, etc.) at each stage of a Request (Pending, Not Confirmed, Confirmed Requests) and depict it on your Client’s Account Page:
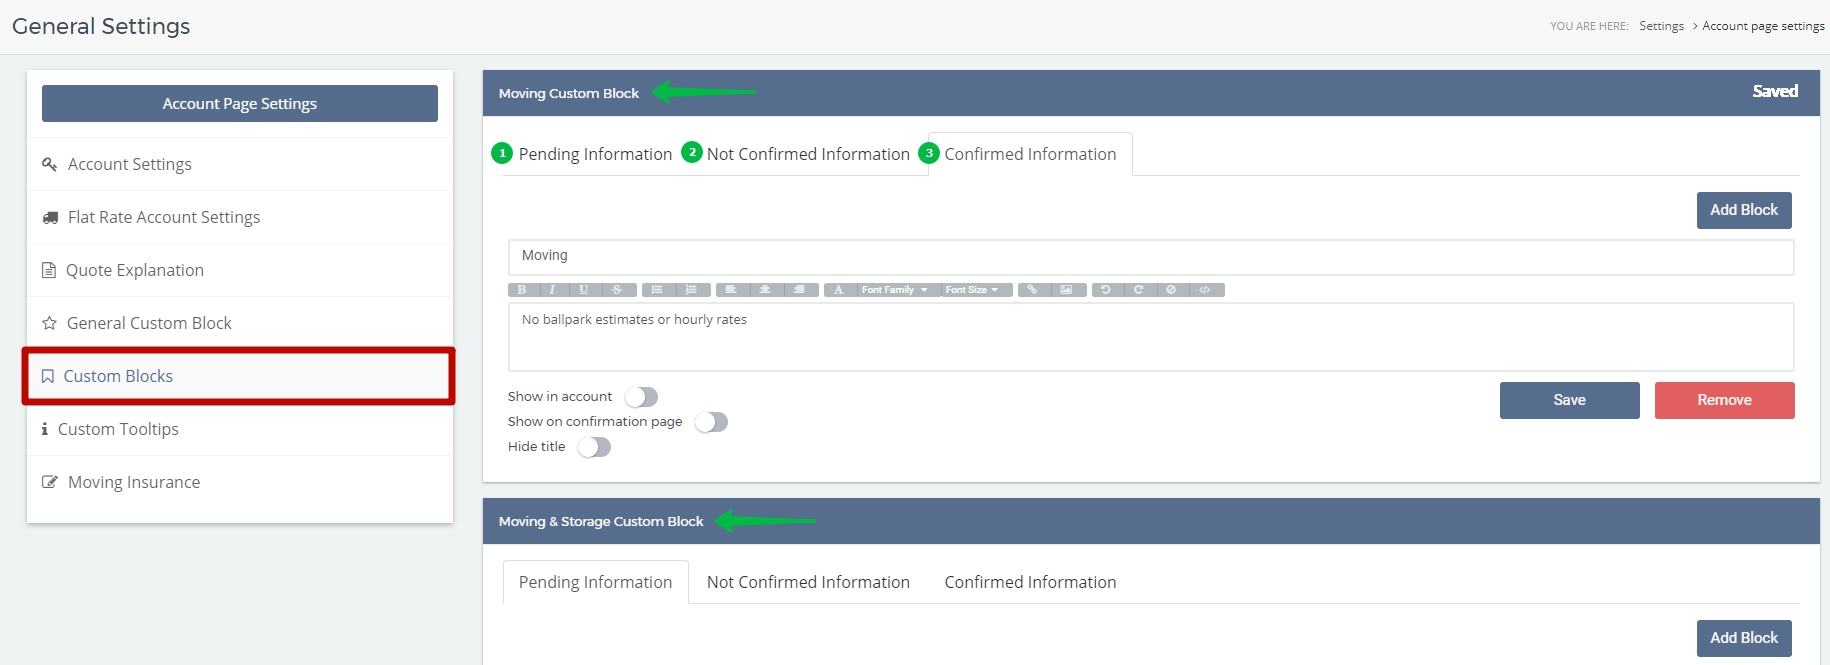
To create a Custom Block:
- Choose the necessary type of the Block you want to create (for instance, Moving > Confirmed Information);
- Click on “Add Block” (if there is no blank one);
- Add the title of the Block (if needed);
- Add the necessary filling of the Block (a text or an image);
- Make “Show in account“, “Show on confirmation page“, “Hide title” Settings;
- Click on Save:
The Client’s view of it will be the following:
 What is the difference between General Custom Block and Custom Blocks?
The main difference is that Custom Blocks can be changed for a Specific Request whereas General Custom Block cannot.
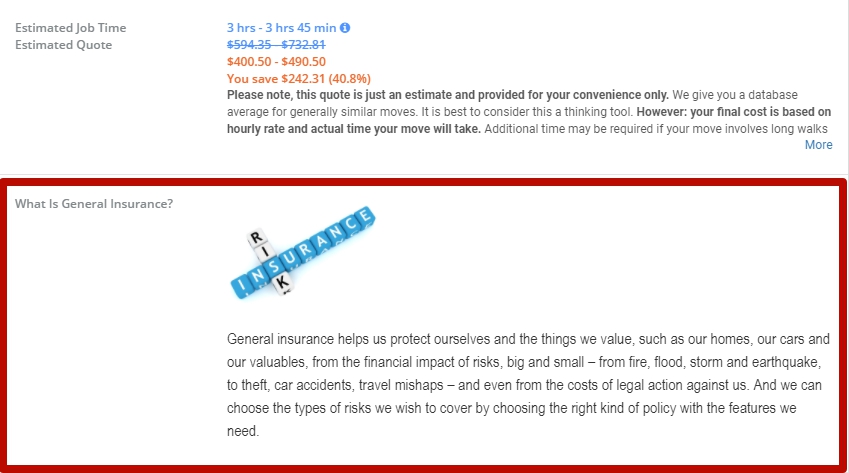
For instance, you have created a Moving Custom Block (Pending Information) giving explanation of general insurance:
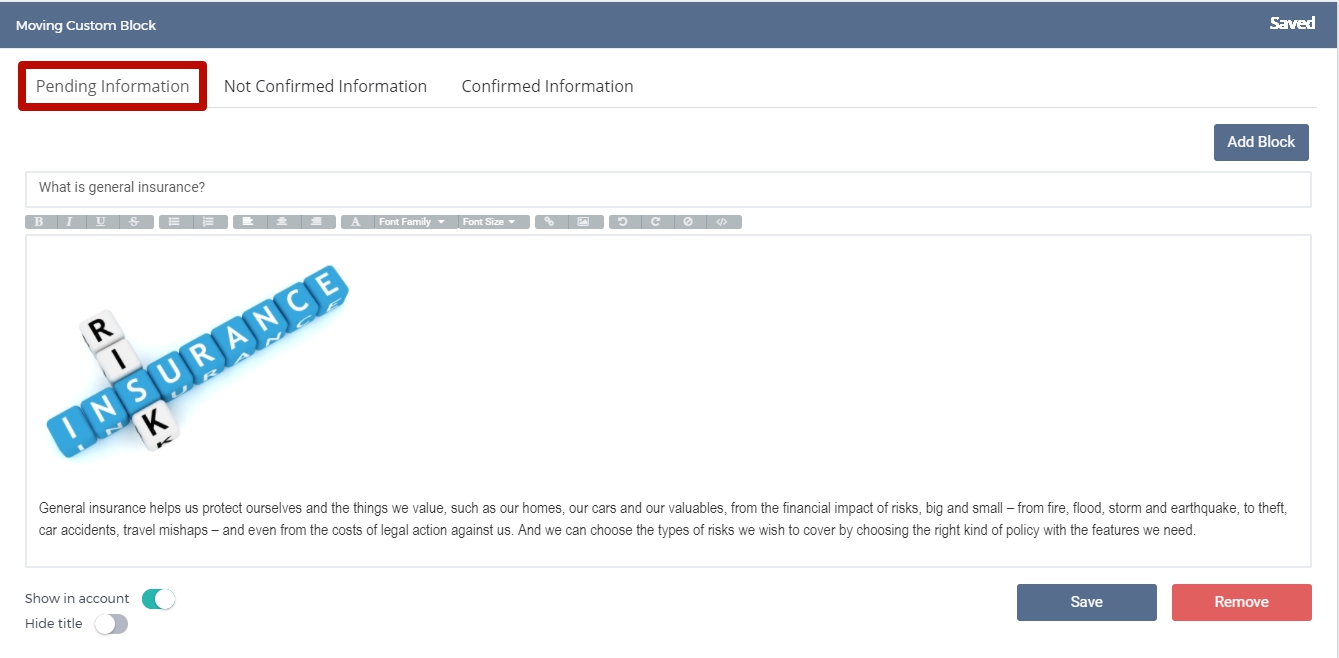
All your Clients having their Requests in a Pending Status will see this Block on their Account Pages as follows:
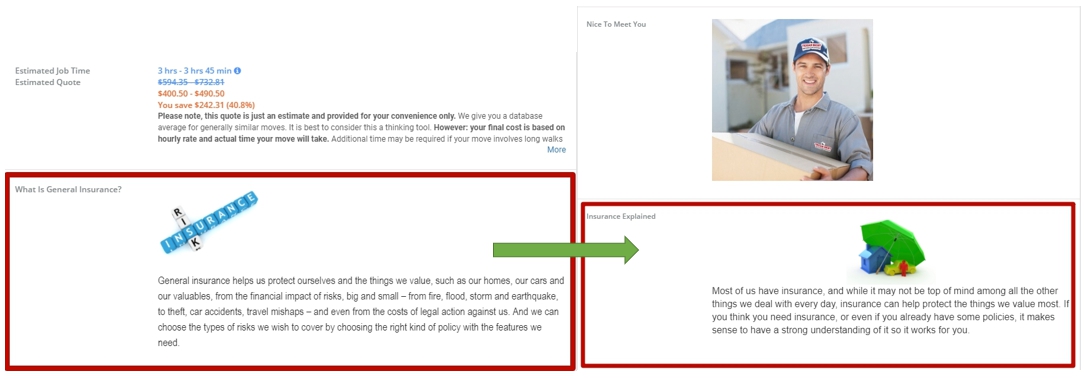
But what if you want to give another explanation for a Specific Request?
Find the necessary Request in MoveBoard > open the Request Form > Settings > Account Page:
- Organize an Additional Block in accordance with your preferenes;
- Turn on “Show additional block“;
- Turn on “Show on confirmation page” (if needed);
- Click on “Save account page settings“:

As a result this Custom Block will appear on the Client’s Account Page instead of the previous one:
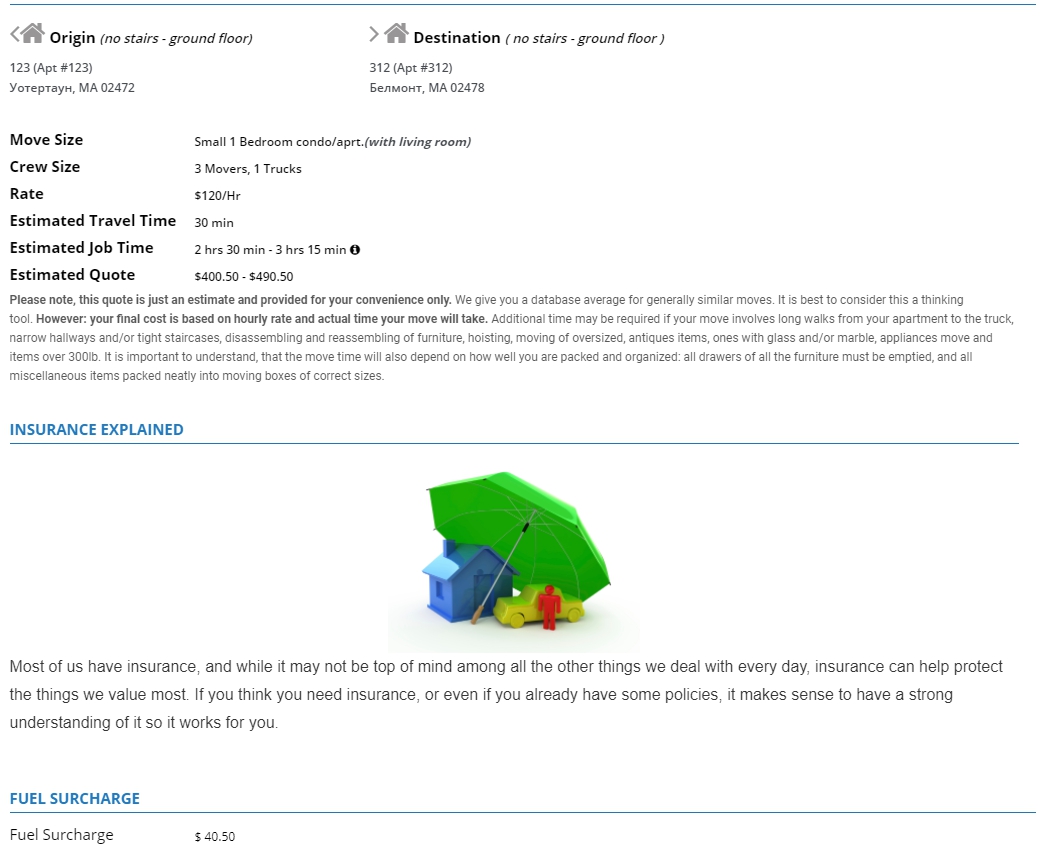
According to the Settings that were made for this block it will also appear on the Confirmation Page only for this particular Client:
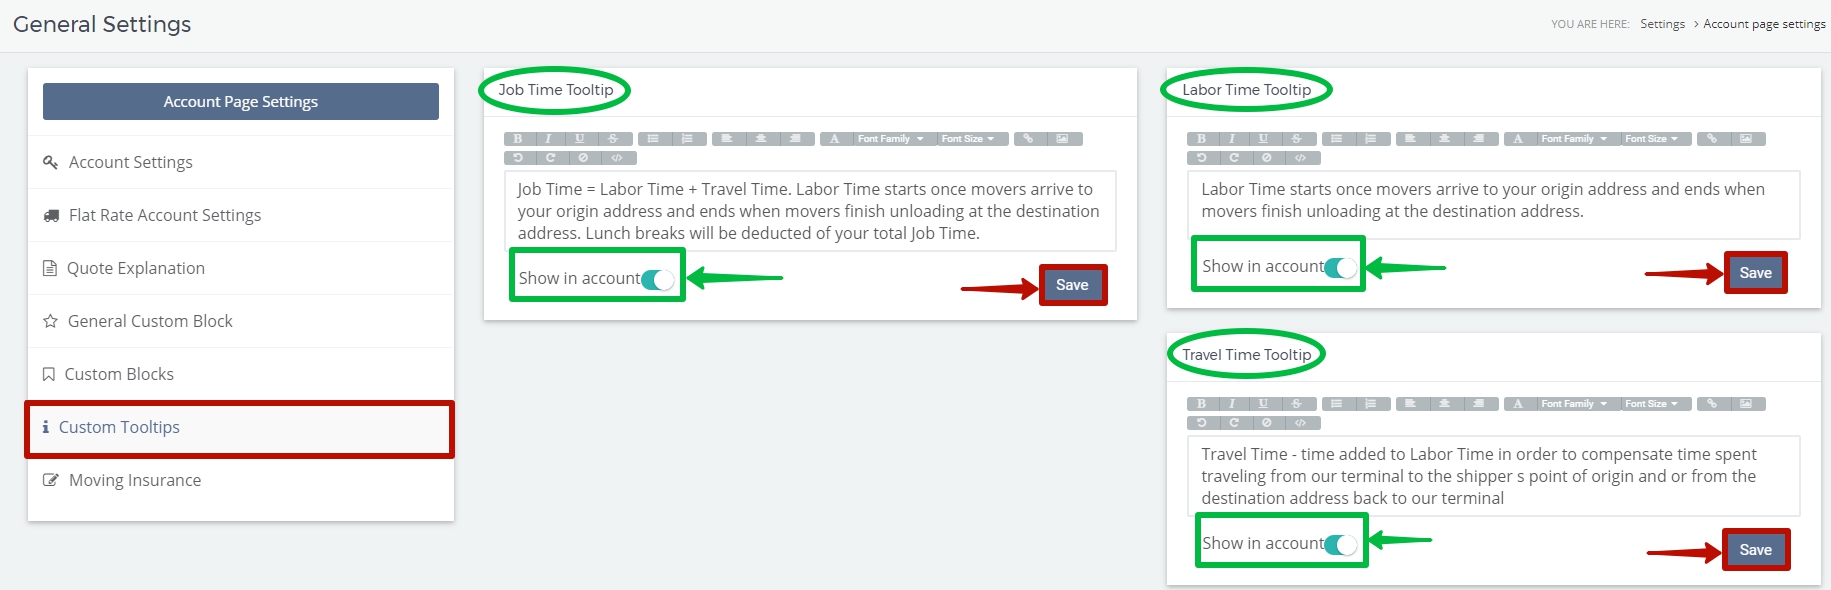
6. Custom Tooltips
Here you can give commentary on or explanation of the notions that may be unclear for your Clients.
- Add the text or images you need;
- Turn on the function “Show in account” (if needed);
- Click on Save:
As a result your Clients will see the explanation on their Account Page right away when they place the mouse pointer on the icon “information” like this:
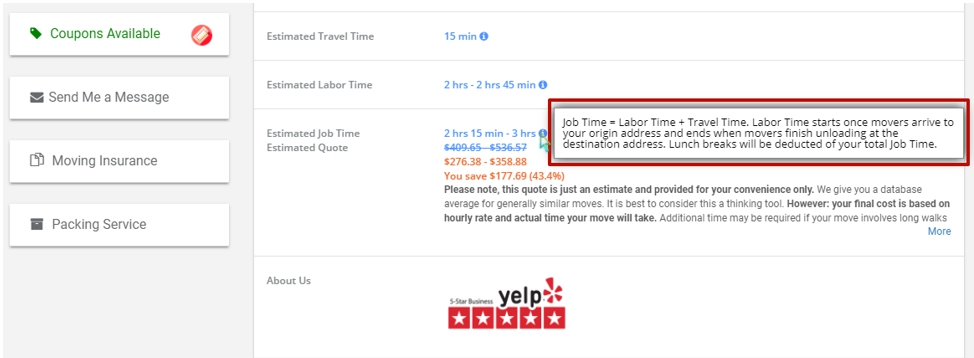
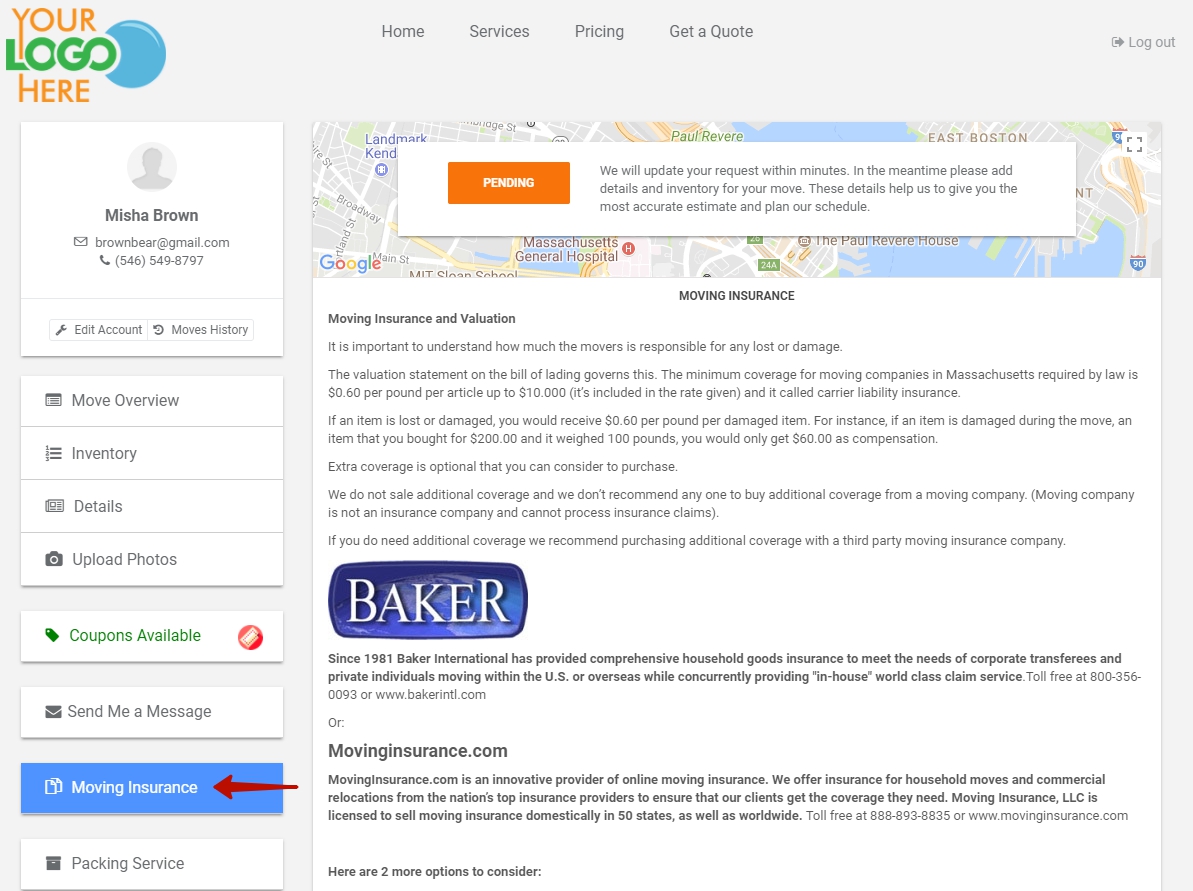
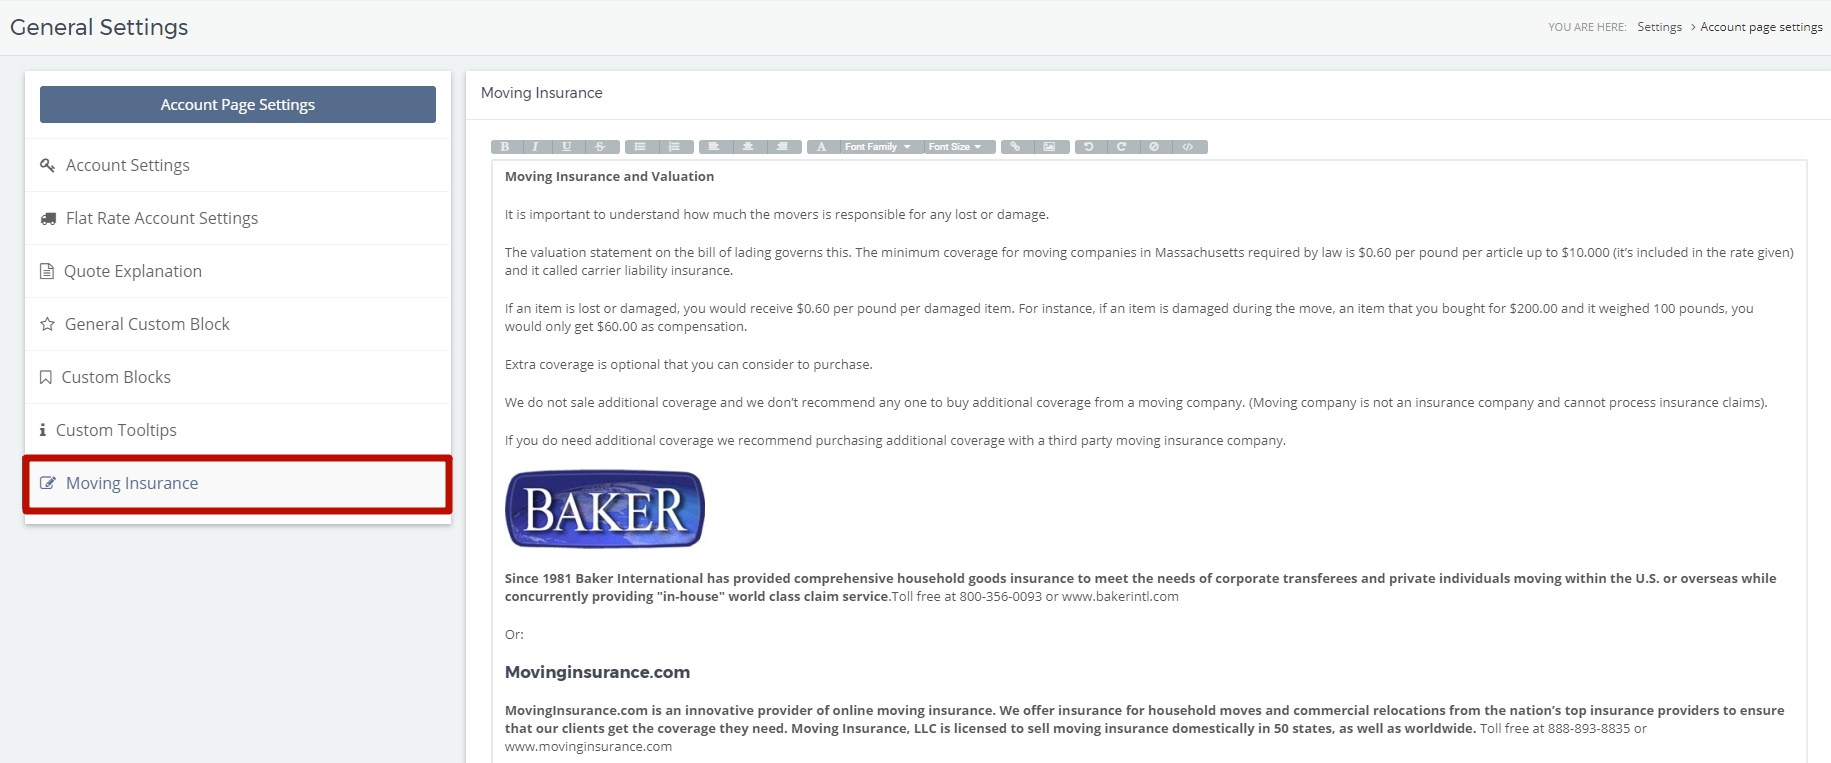
7. Moving Insurance
Your can edit the text on Moving Insurance in accordance with your preferences:
Your Clients can find and read it on their Account Page when clicking on “Moving Insurance”: