
On the Header, you can see the Login, Menu, Search, Create Request, Notification
Login
When you sign up as an admin, you get full access to all the developments of your software. It means that you can manage all items for work. You can give permissions for using some parts of the software to your staff.
Menu
Depending on which account you visit, the menu changes. If you are login as the admin, you can see all the possible items in the menu.
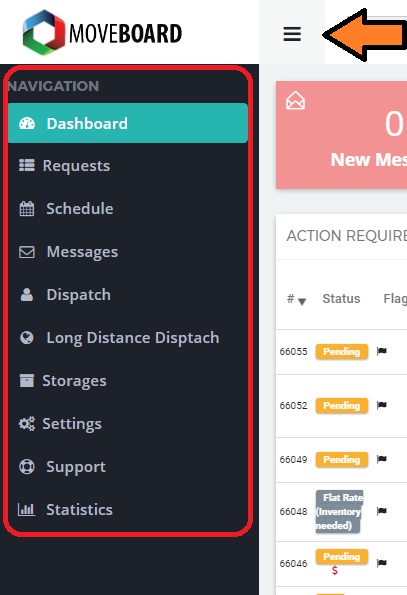
If you are login as a manager, sales or foremen, you can see only that parts of the menu that admin permits to you.
Here an example of a foremen’s menu.

The Searching Option
The searching option “Searching anything” is available for each staff. Here you can find any request that was created.
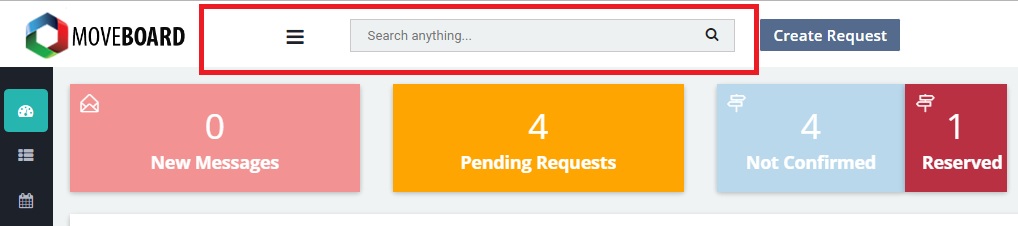
The Foremen uses the other type of search and can find only the assigned jobs.

Creating the Request
If you want to Create Request – just click here and fill the form.
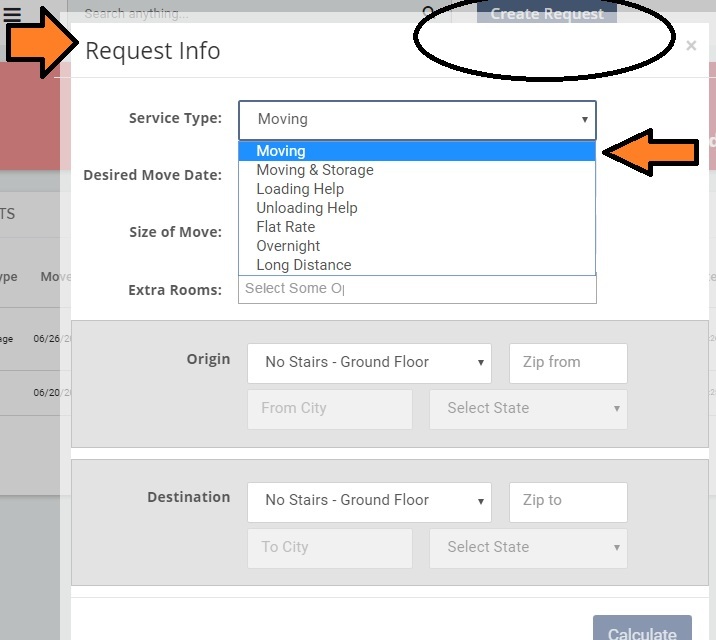
Then choose the Service type you need.
- Moving – the service only for moving to a local distance, or a special distance the company is established
- Moving and Storage – it is a service for people needed to keep their stuff for some time, and only after that time, they are moved
- Loading Help – it is a service mostly for busy people or for people that need help for loading their inventory
- Unloading Help – the service to unloading client’s inventory
- Flat Rate – it is the fixed price for the moving
- Overnight – it is a service for people that need to get their inventory on the next day after its loading
- Long Distance – it is a moving for a long distance
Depending on the zip code the Service Type can changes. You can set up this part of the form in the Settings.
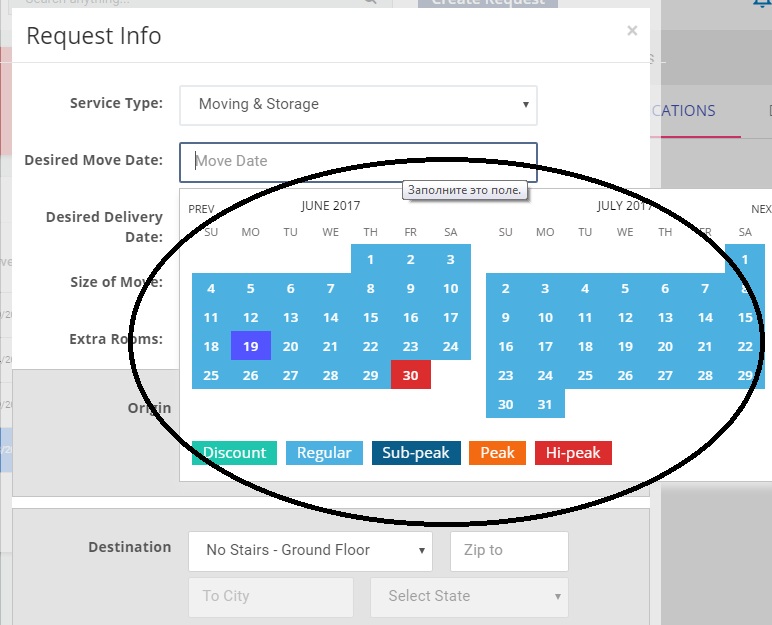
In Desiring Move Date you can check the date of moving in a calendar. Also, you can set up the flags about the hi-peak period or the regular days. And if you choose the hi-peak day, the price of the request will be higher than if it would be the normal day.
On Size of Move, you indicate the size of the room ( flat, private house ) the from what place does client move. Add the extra rooms if necessary.
On Origin and Destination, you choose the zip codes and additional information. (Is there an elevator or not? )
Then click to Calculate. And there you can see the info for counting and the approximate cost of the request.

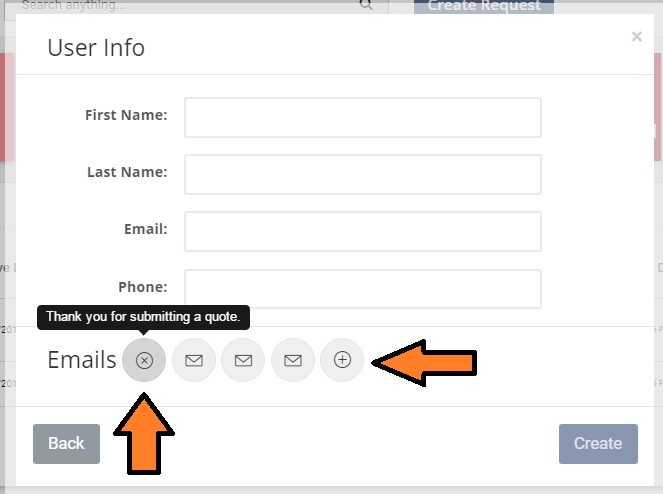
Then Continue and enter the User Info. Here you can choose the type of emails notification and create the account. The notifications about creating the request come to the client automatically.
The Notification
The Notification has an icon of a bell. Go to the notifications and see all its options. Just mouse over the other items there. There you can see basic options: turn off the notifications, dismiss the notifications and filters.
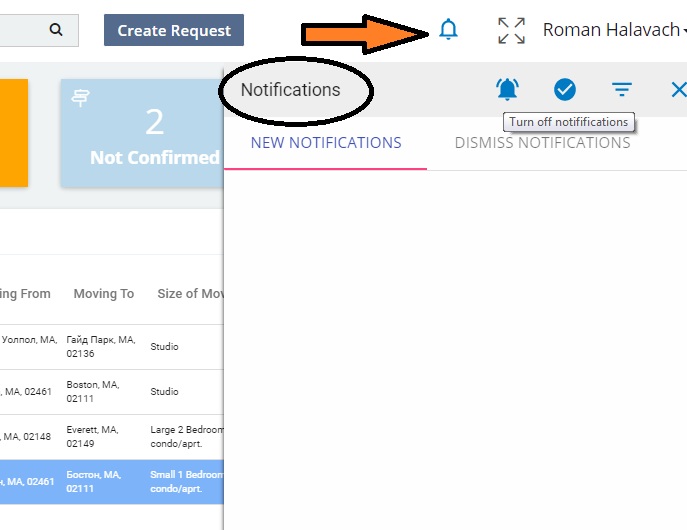
You can see and set up the Notification in the Settings -> Notification.